

Changing the Thermocouple on a Motorhome Fridge
This post is about installing a new thermocouple on a motorhome fridge, when it’s not staying lit while running on gas. Specifically it’s for a 2001 Hymer B544 motorhome with an Electrolux RM6401 fridge.
Why Change a Motorhome Fridge Thermocouple?
Honestly, if you can avoid it, don’t! It’s not an easy job.
Many of the issues we’ve had over the years with our motorhome have been with the fridge not working properly on gas. Almost always the problem has been with the burner being blocked with bits of debris or being old and rusty. I’d always exclude that before thinking about changing the thermocouple.
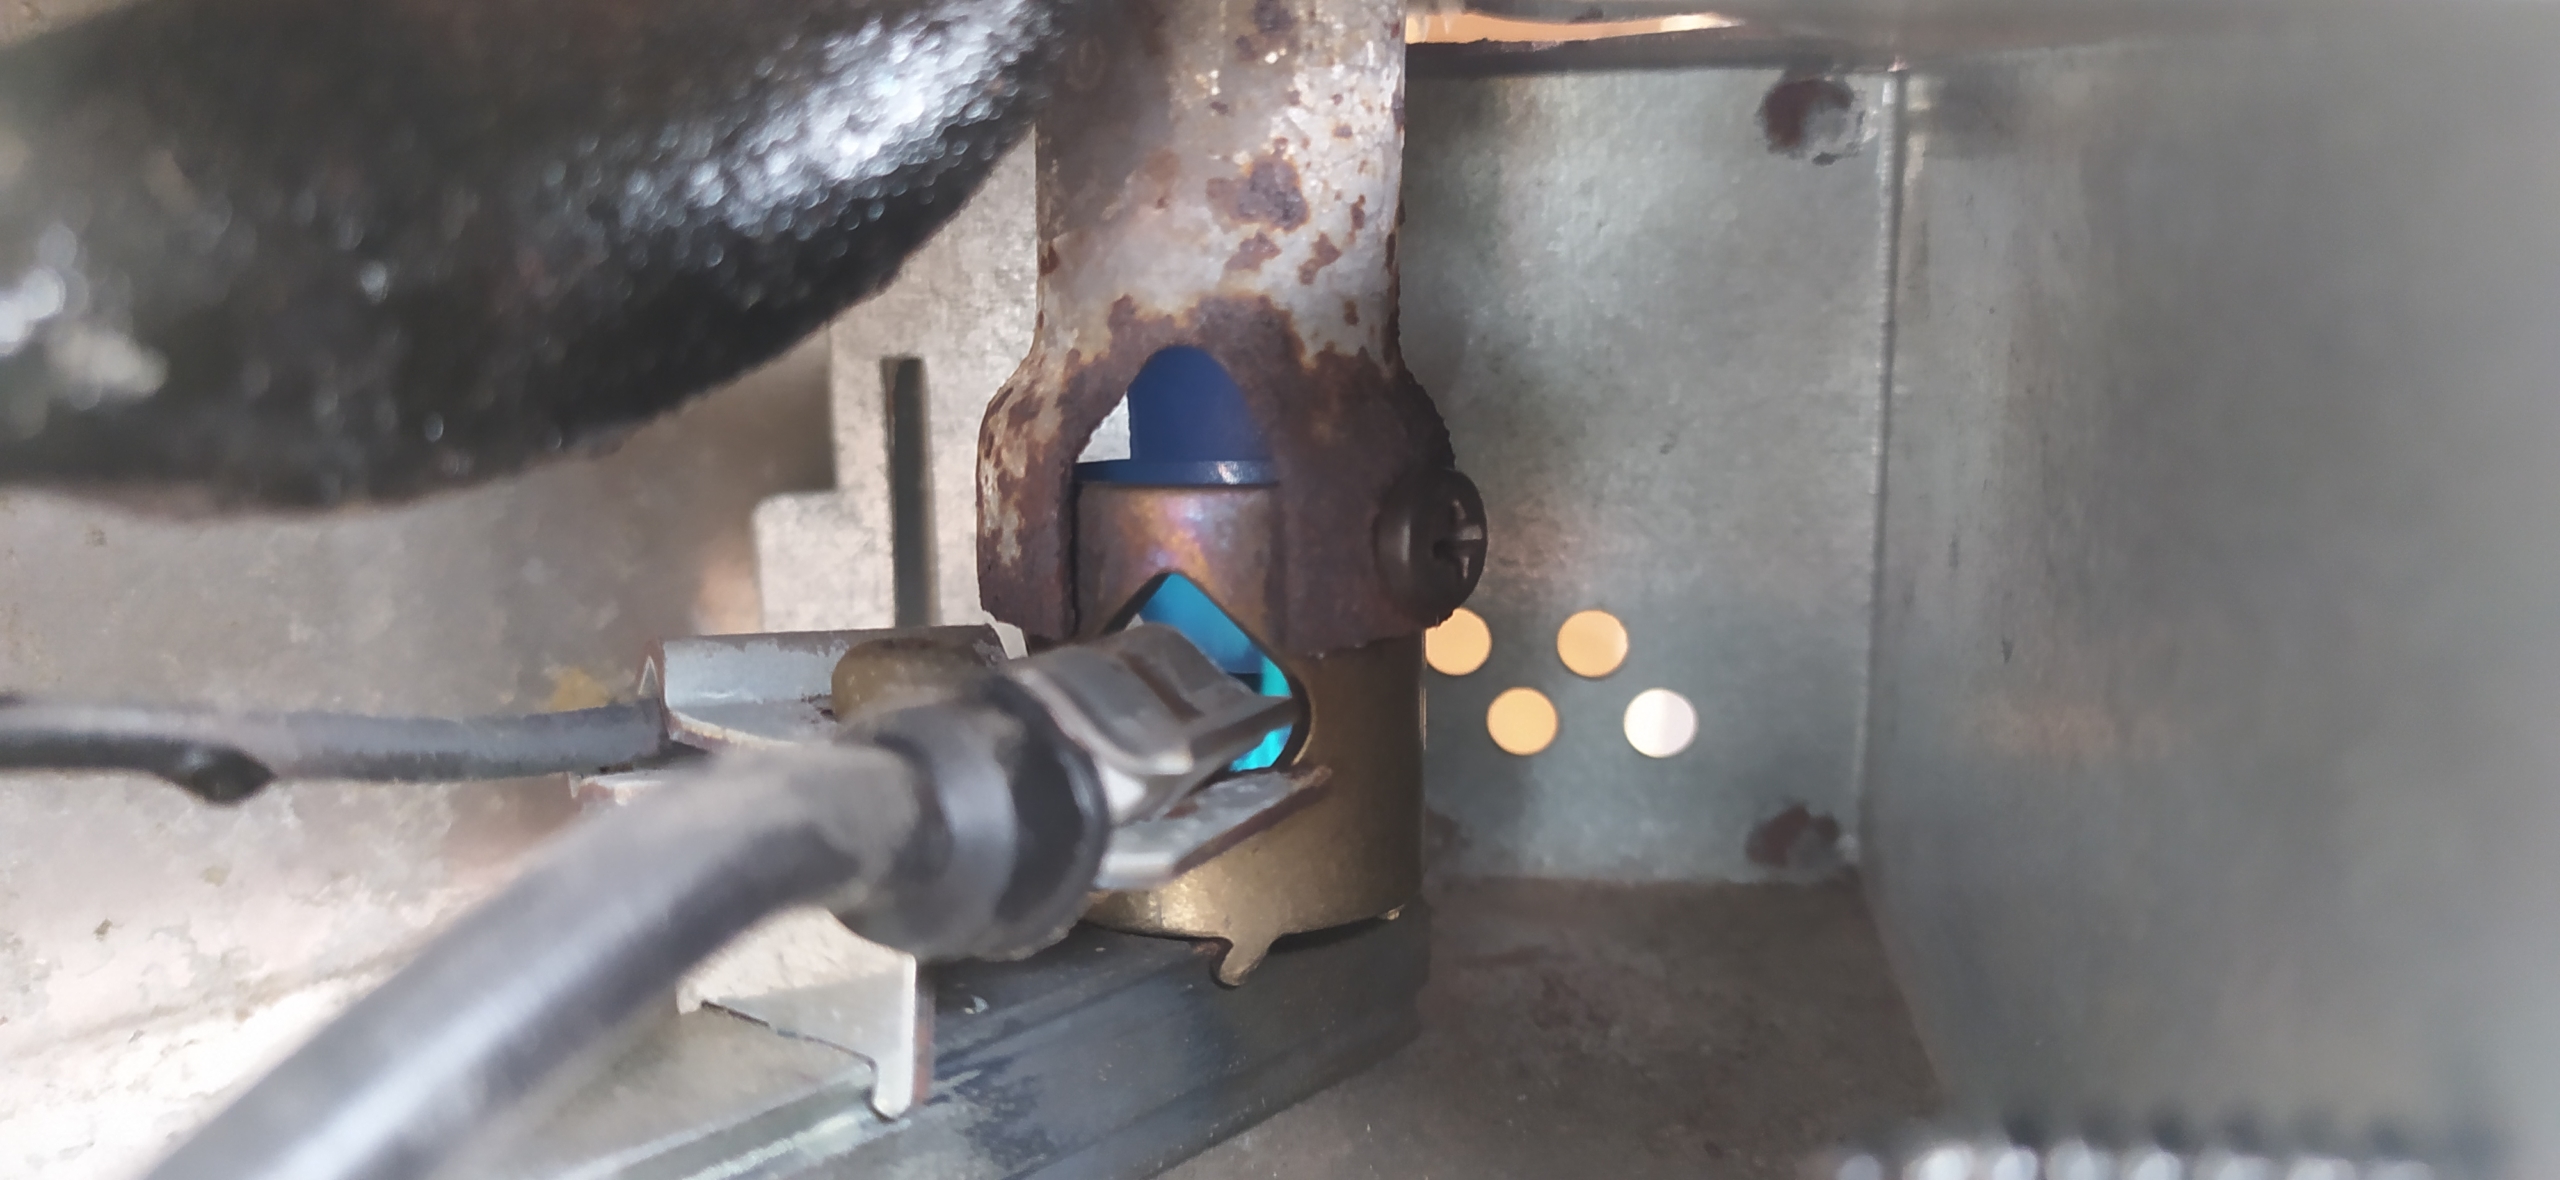
Take off the lower fridge vent, remove the metal box surrounding the burner and use compressed air or a hoover to blow/suck any dirt from inside the burner. Also clean the flue pipe above the burner, as soot or rust can drop down from it.
If that doesn’t work, change the ‘jet’, the small metal disk with a tiny hole which sits inside the burner, or change the entire burner. These jobs require breaking a gas connection so you may want to get a gas-qualified professional to do it for you.
We’d excluded those issues with our fridge. The burner and jet has been replaced and it had been recently inspected by a professional and was cleaned out thoroughly. The fridge was working on gas at that point, but over a period of a few weeks we had to hold the ignitor switch in for longer and longer periods after the flame had lit and the ignitor light had stopped flashing (and clicking). We’d hold it in for 60 seconds and the ignitor would start up again when we released it. When we did manage to get it lit with the ignitor release, it stayed lit, so we guessed the thermocouple was working but only just.
Eventually it simply refused to stay lit no matter how long we held in the ignitor switch. That meant we could only stay on places with electrical hook-up if we wanted a cold fridge. We came to the conclusion it was probably the thermocouple which had died. It was at least a decade old and might have been the original, making it 24 years old.
How the Thermocouple Works
One end of the thermocouple sits in the gas burner at the bottom rear of the fridge. When the flame is lit, it heats up and creates a small voltage. This voltage is carried to a gas control valve on top of the fridge via the thermocouple wire. When you release the ignition switch, this valve stays open, allowing gas to continue to flow to the flame.
If the flame goes out (blown out in strong winds for example), the thermocouple cools, the voltage drops and the control valve closes (and the ignitor starts clicking again). This prevents unburned gas flowing with the risk of a fire.
If the thermocouple fails, it won’t generate enough voltage to keep the control valve open. In this case no matter how long you hold in the ignitor, it will start clicking again when you release it, as the flame has gone out. That’s what happened to ours, we guess.
Important Safety Stuff
Before we get any further please note: I’m a DIYer, I’m not qualified in any way or an expert in anything in this blog post.
Please treat these instructions as such. It’s easy to damage your motorhome or yourself. I can’t be held responsible if this happens to you, please do your own independent research.
There are various safety issues involved with the job and if you’re not confident, I’d highly recommend paying a professional. It probably won’t be cheap as it’s an awkward job and the spares are more expensive than I’d imagined. But it beats being hurt or suffering expensive damage to your pride and joy. Also, some engineers won’t touch older vans like ours, we had a mobile engineer refuse to look at it. Finally, habitation repair companies can get booked up for weeks or even months. If you know your fridge isn’t working properly, it pays to get booked in a few weeks before you plan to go away.
I took on the job myself and had to expose electrical connections and break a gas connection. I think I could have gotten away without breaking the gas connection in hindsight (see below). Before starting the job I isolated the gas at the bottles, made sure the van wasn’t hooked up to mains electricity and turned off the 12V at the motorhome control panel.
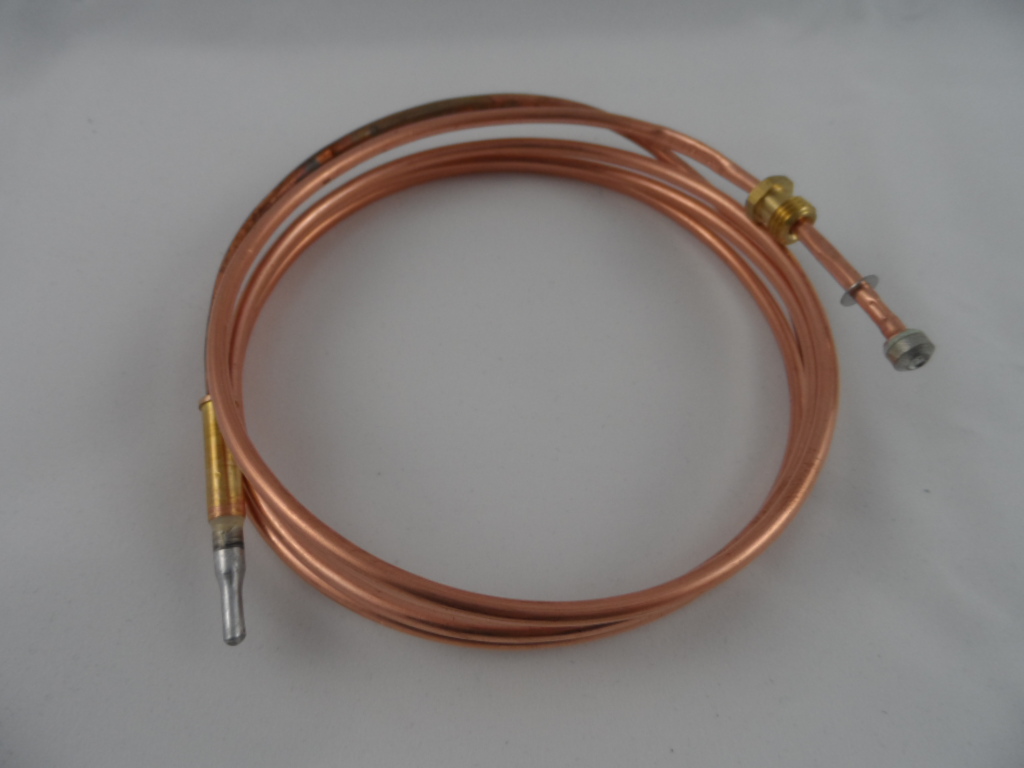
Sourcing a New Thermocouple
Our fridge is an Electrolux RM6401. Initially I bought a new thermocouple from eBay for a few quid, which claimed it fitted ‘All RM Model Fridges’. It didn’t fit. The end which screws into the gas control valve had the wrong gauge thread, and couldn’t be screwed in. I bit the bullet and bought a thermocouple specifically for the RM6401 model. It cost £78 including delivery, from inter-spares.co.uk.
Changing the Thermocouple
These are the steps I took to change the thermocouple. Not many photos, sorry, I was too busy trying to sort the job out!
- On our van the rear bumper has to come off to access the lower fridge vent. It’s held on with a series of screws hidden behind a grey rubber trim (easier to work with in summer when it’s warm and flexible). I used bungees to hold the bumper off the ground to reduce the strain on electrical connections to the lights.
- Remove the lower fridge vent (turn the left hand screw 90 degrees and it lifts out).
- Remove the metal casing surrounding the burner (a few screws).
- Release the burner from the flue (one screw).
- Release the thermocouple from the burner (one star-shaped screw – torx I think).
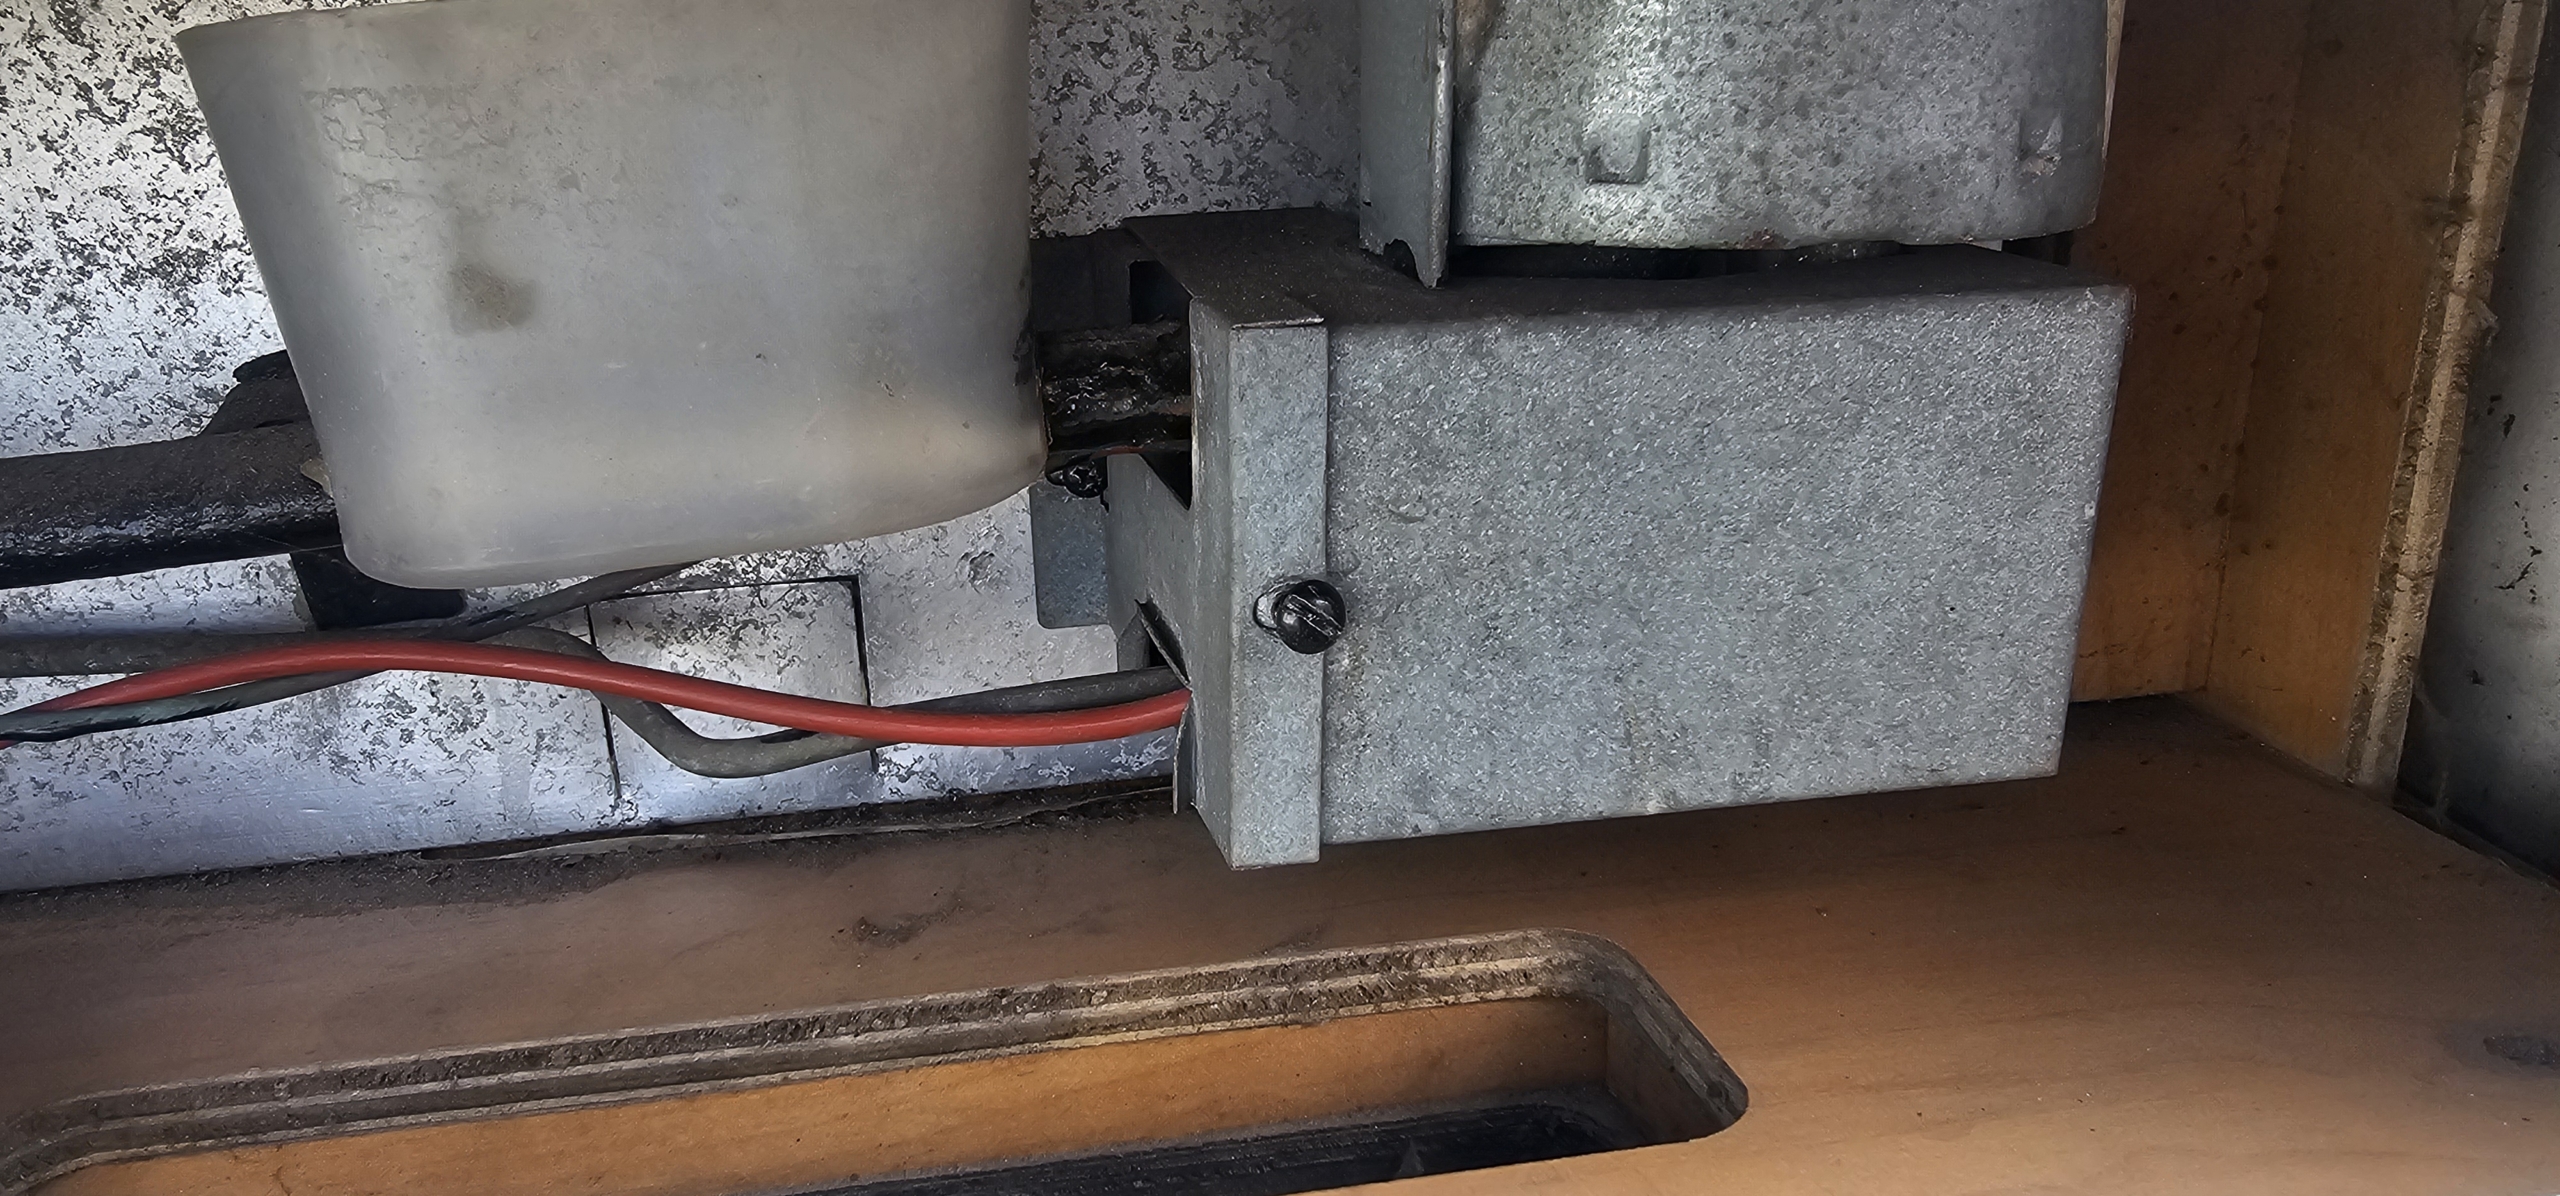
- Undo the gas connection to the hob at the red isolator switch under the sink. I did this thinking it would give me more room to work under the hob without actually disconnecting the gas fitting under the hob. In practice there was enough room without doing this.
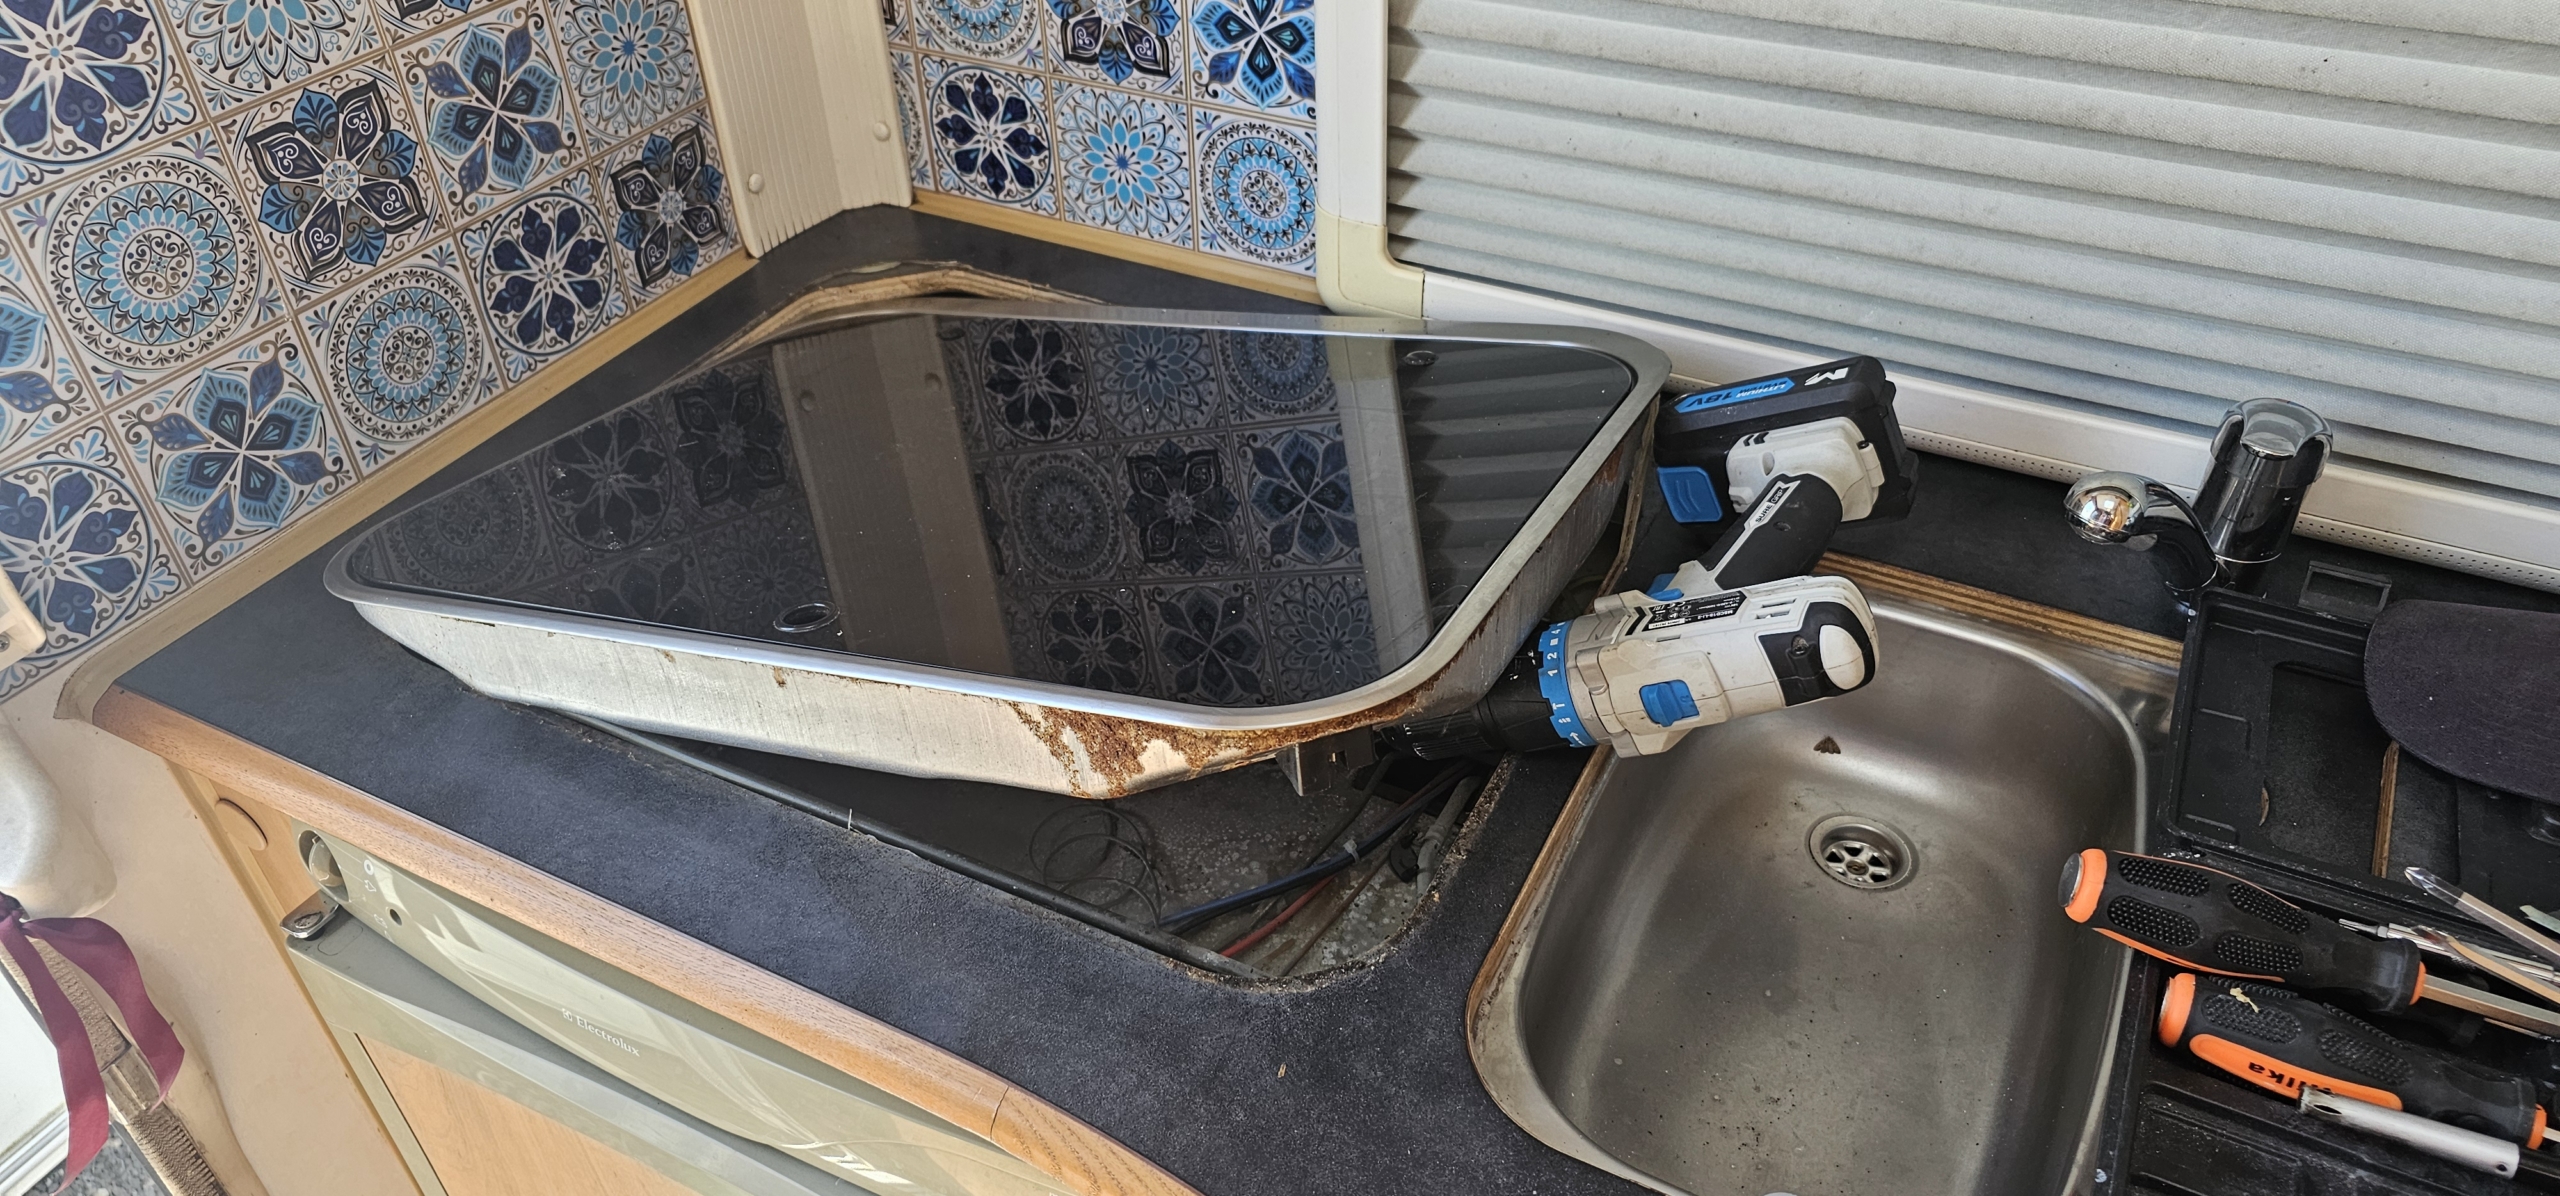
- Remove the screws from the hob above the fridge. Ours were rusted and had to be drilled out, which broke all the plastic clamps and added to the cost of the job (see below). The new screws were star-shaped (again torx I think).
- Without breaking any gas connections there was enough space to get a spanner under the hob to undo the thermocouple from the gas valve.
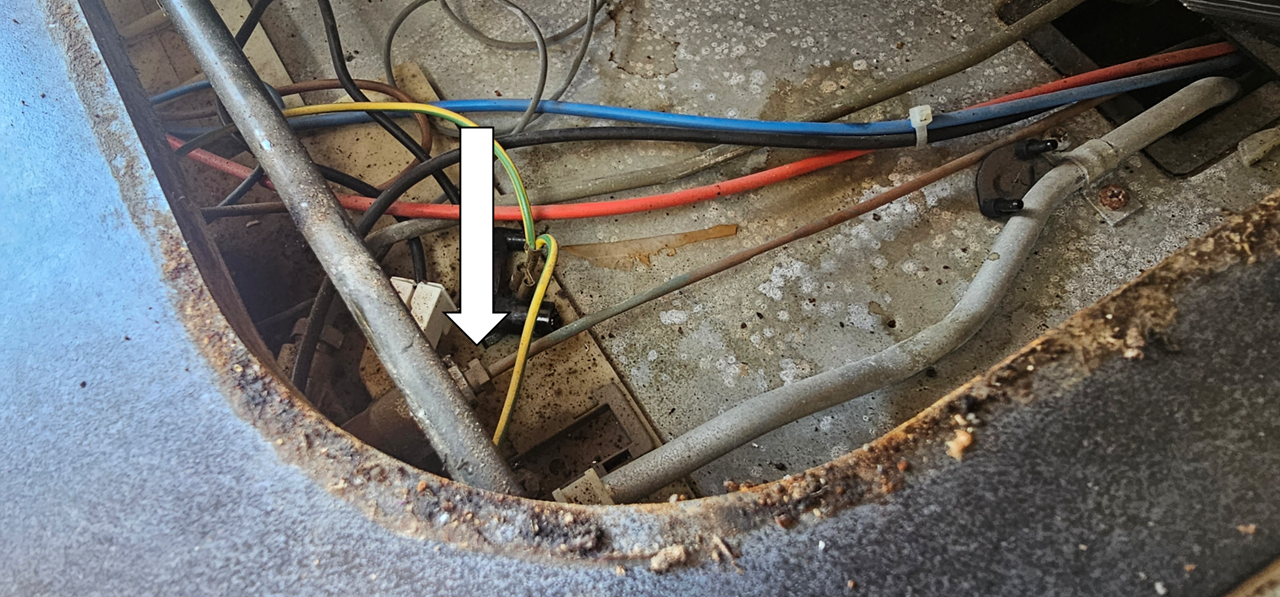
- Remove a couple of tie wraps to enable the thermocouple to be pulled through via the upper vent. Not easy, there wasn’t much room to pull the wire through and I ended up cutting it in half to help.
- Install the new thermocouple. It was awkward but possible to use a small spanner to secure it to the gas valve. Carefully feed it through the top of the fridge and out through the upper vent. Then feed it down to the lower vent.
- Secure the new thermocouple to the burner, with the end sitting above where the flame will be.
- Reinstall the gas connection at the isolator. Turn the gas back on and test the above connection with leak detector spray.
- Reinstall the burner and test the fridge stays lit. Jump for joy if it does! Test it again several times to be sure.
- Reinstall the metal gas burner cover, vent covers and bumper.
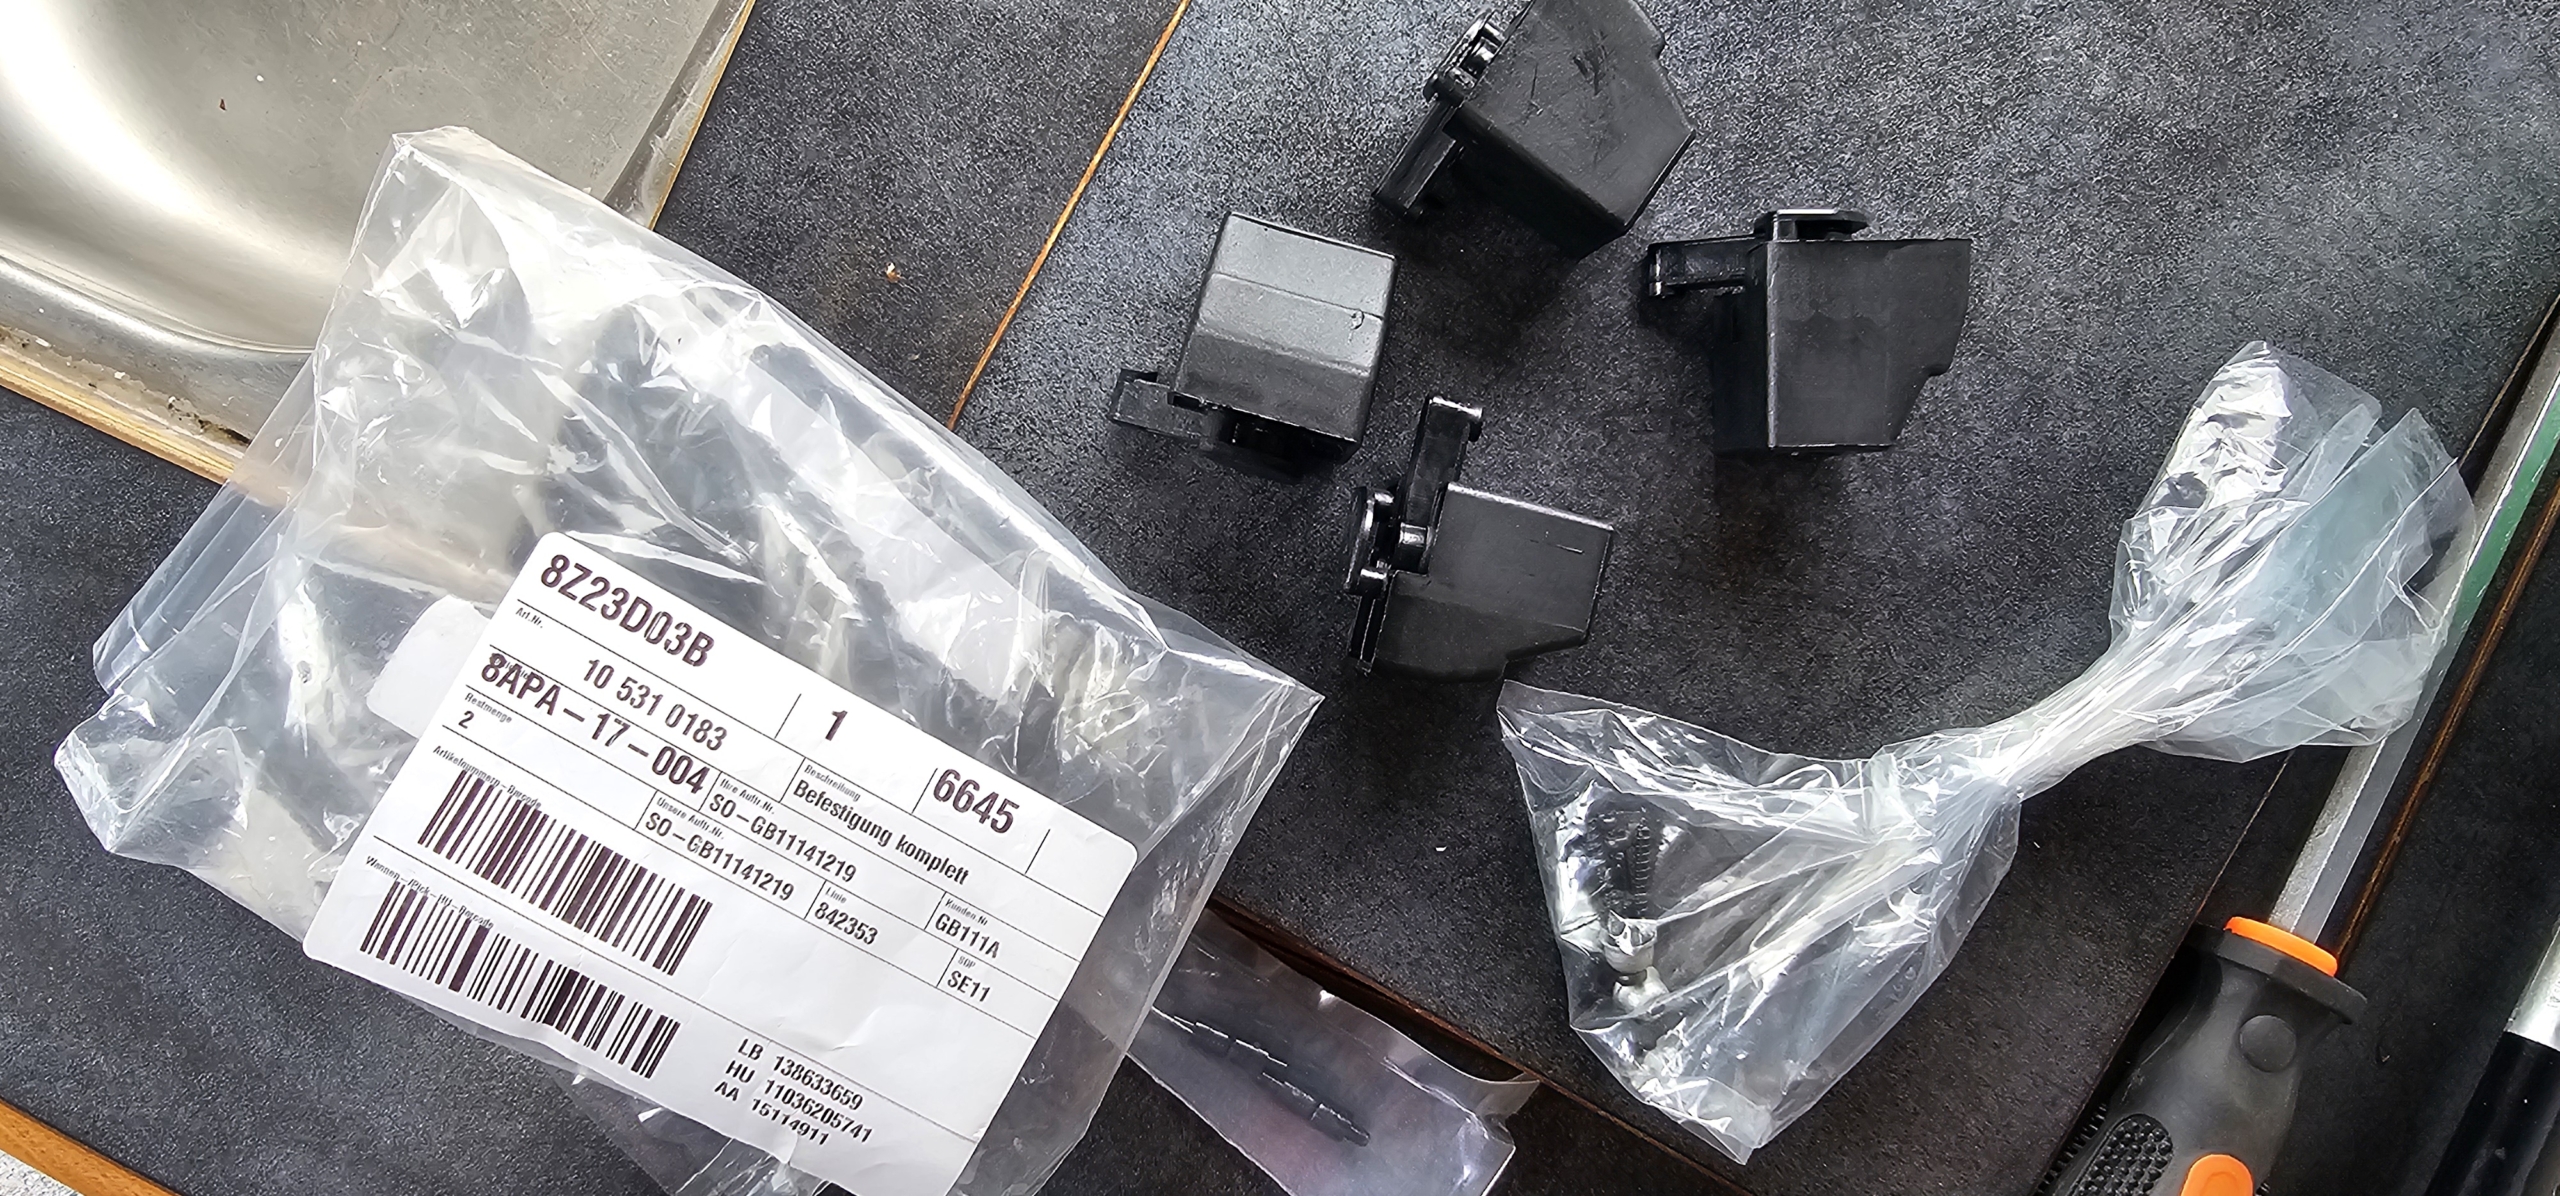
- Secure the hob back in place. In our case this uses four specialist SMEV plastic clamps which were all broken when I drilled out the screws. A new set cost £65 from The Leisure Warehouse, and it came with new screws, caps and the little metal cups the screws sit in. This bit was awkward as it just didn’t want to sit right, but eventually it lined up. I should have used silicon under the hob rim to seal it but was so relieved when it finally fitted I just left it secured.
An alternative to removing the hob is to slide the fridge out. I spent a good two or three hours trying to do this. I removed the four screws inside the fridge (one was seized) and it would barely move. I removed cupboard doors and fittings from the side of the fridge in case the screws were protruding into the fridge. In the end I gave up and took the hob off.
Cheers, best of luck, Jay


Only you could turn swapping a thermocouple into such a gripping saga! Most of us would have muttered a few choice words and called in the pros, but you’ve managed to make it sound like a DIY triumph (with just a sprinkle of drama). Joking aside, your step-by-step is really clear and genuinely helpful – you’ve probably saved a few of us from frustration and a hefty repair bill. Now, waiting for you to make rewiring the whole fridge look easy too!
🤣