
Reseal a Leaking Skylight for Under £20
If your motorhome skylight or roof vent is leaking, here’s how to reseal it for under £20. The mastic on our skylight has aged over the years, and water was dripping inside in heavy rain, never a good thing. I’ll be honest, this isn’t a fun or fast job, but you could save hundreds of pounds if you’re able to do it yourself.
Sorry, the Skylight Has to Come Off
Yep, you’re going to have to take the whole damned thing off. We’ve all tried whacking some silicon around the skylight base in the hope it’ll fix the leak. If it does, it’s temporary. The only way to get a permanent seal is to take the skylight off the van, remove all the old sealant from the roof and skylight surround, add new sealant and re-install it.
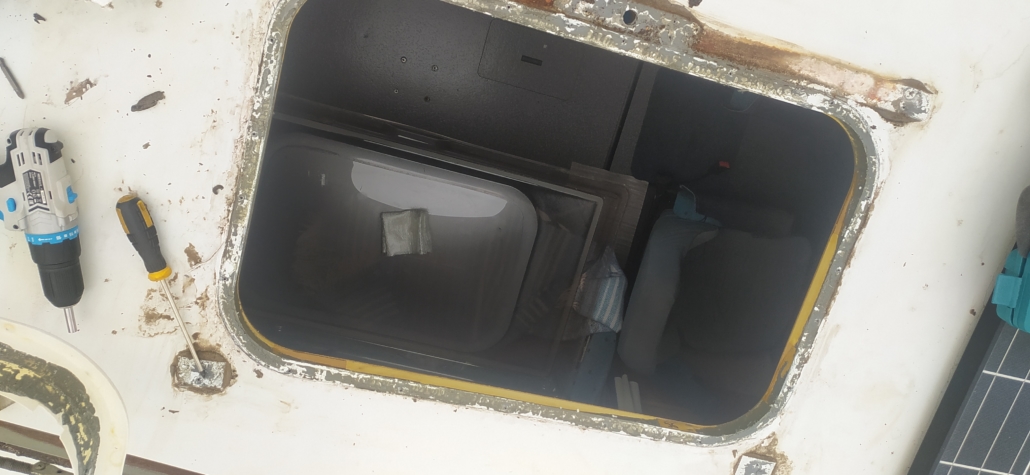
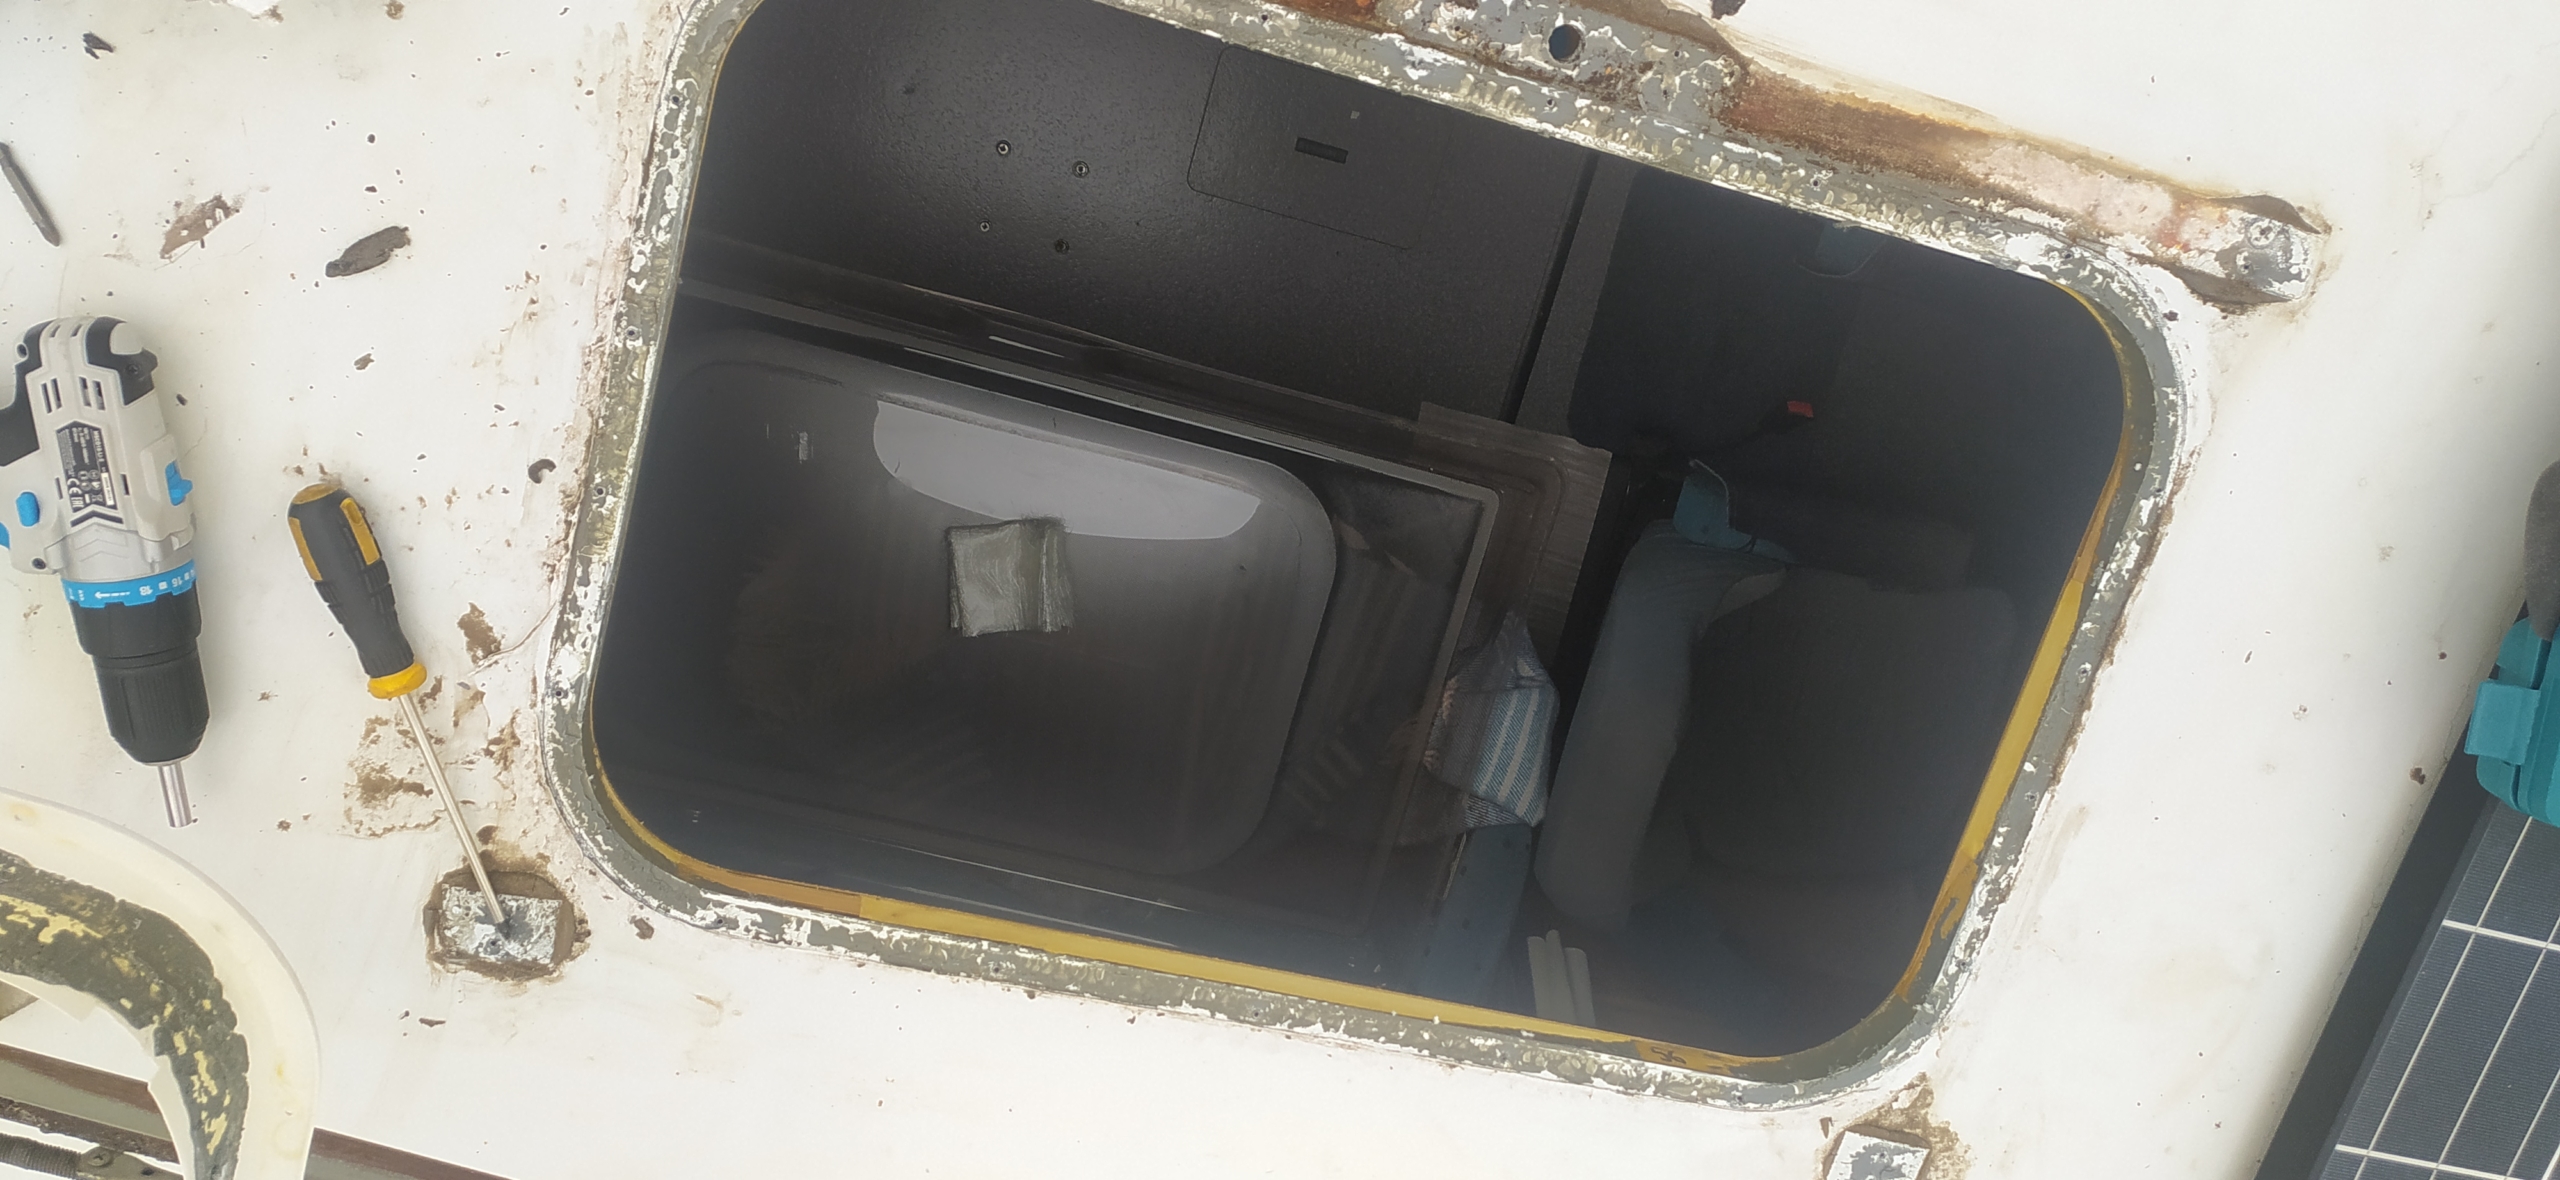
To prepare you for the worst, at one stage of the job your roof will look like it’s undergoing serious surgery:

Sorry, I wish there were an easier way, believe me, but it’s nowhere near as bad as it looks! You only need some basic tools and patience to complete the job. The hardest part for me was getting on the roof, the ladders only just fitted in the Mini!
A neighbour at our storage yard had the same problem with his caravan. He’d found the inside of his skylight full of frozen water in the winter. He’d been quoted over £400 to take the skylight off, reseal and re-install it. The job cost us less than £20, and that included a can of Plasti-Kote to respray and freshen up the interior of the skylight, so it’s worth at least thinking about tackling it yourself.
The Tools You’ll Need
These are the tools and materials I needed for the skylight on our 2001 Hymer B544:
- A philips screwdriver (I also had a cordless drill with a series of bits to help speed up removing some screws).
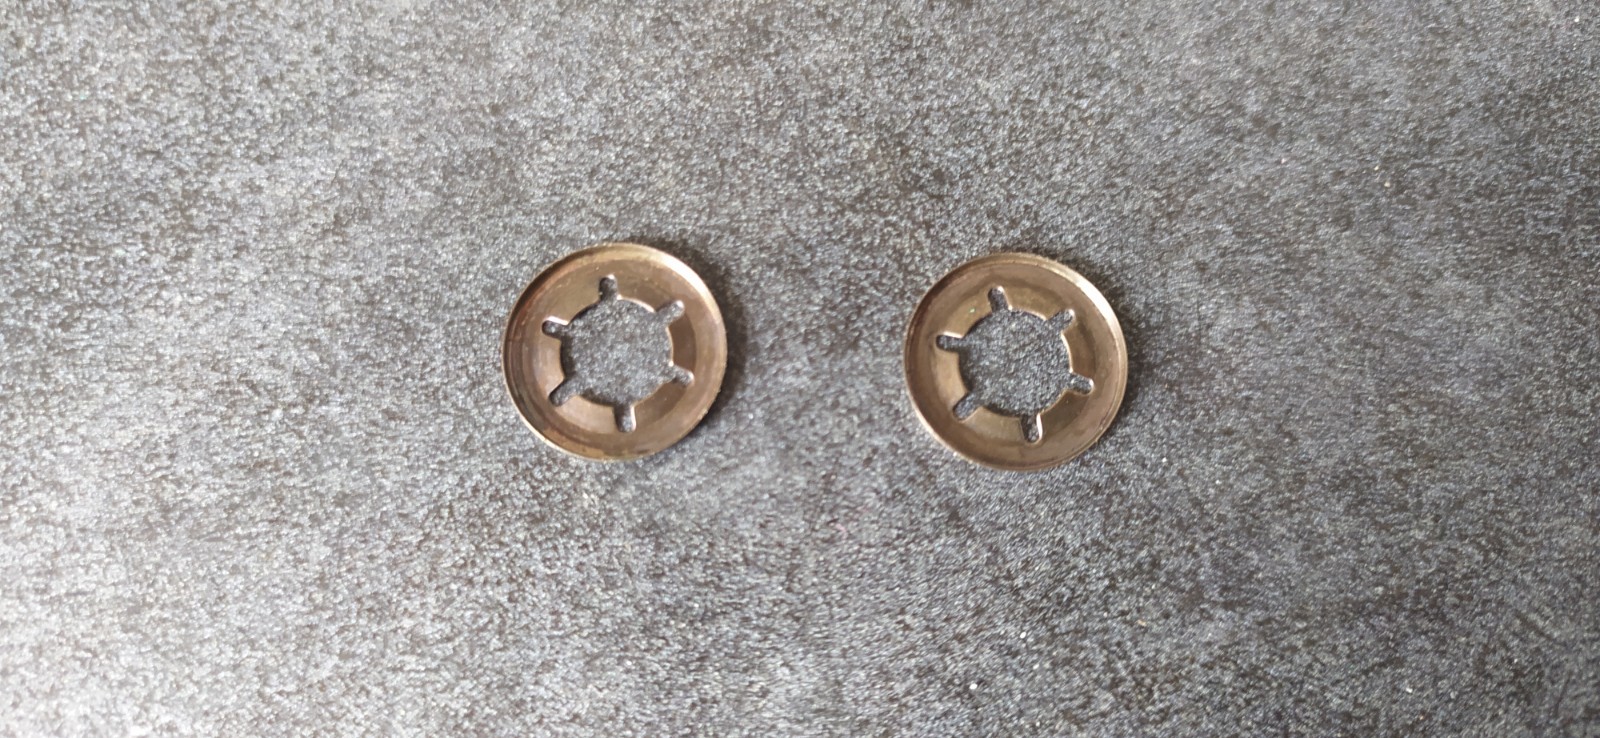
- Pliers (our skylight is held on with starlock washers which have to be broken to remove them)
- Four 8mm starlock washers to secure the window plastic back in place at the end of the job.
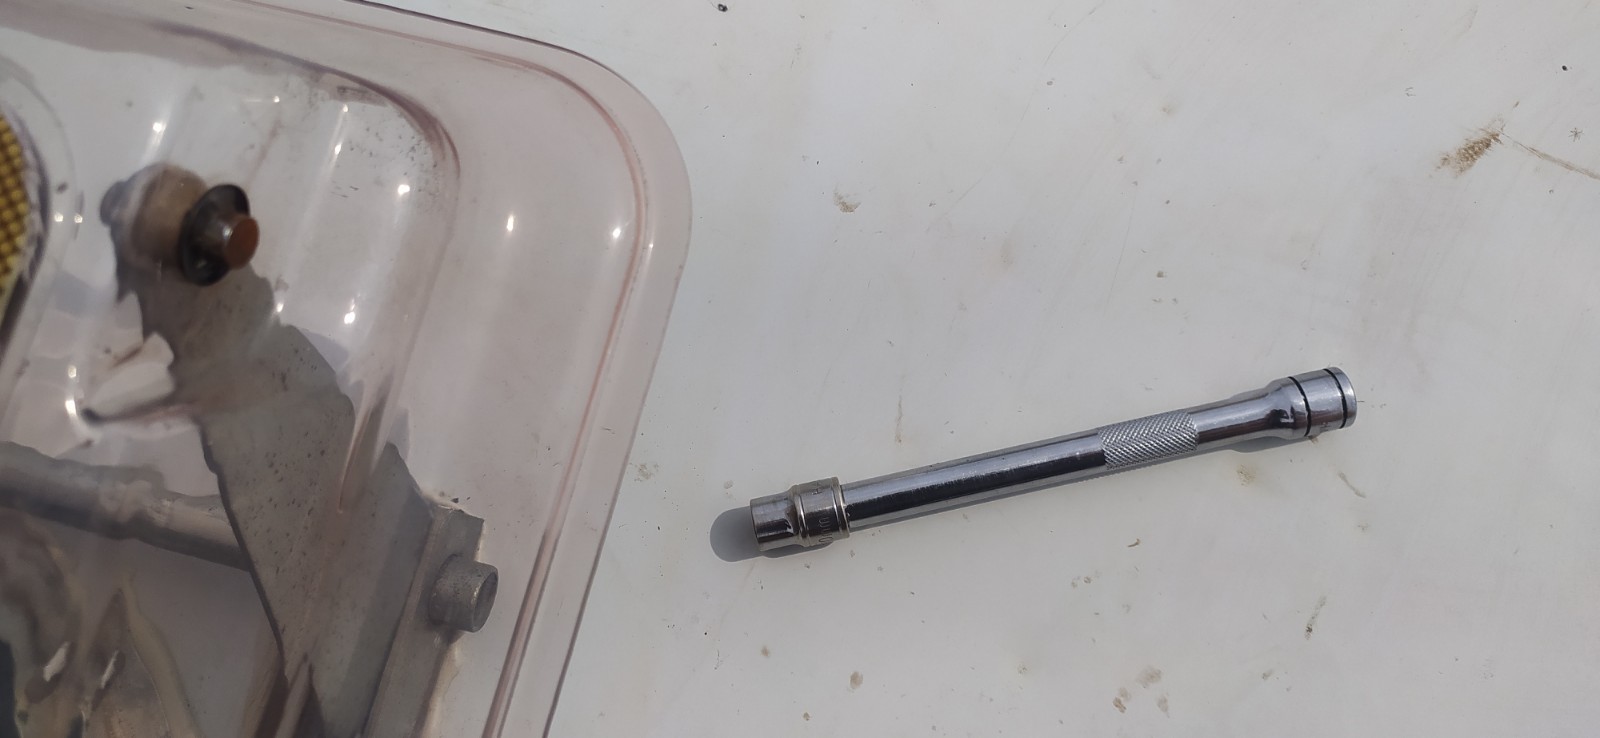
- A socket set and extension bar to use as a starlock washer installation tool.
- Craft knives for removing old sealant.
- A metal scourer pad to remove the final bits of sealant.
- A tube of sealant and an applicator gun.
- Alcohol wipes to clean the sklight and roof before applying the new sealant.
Plus these optional bits and bobs:
- A fibre glass kit (only because I needed to make some small repairs to the plastic window).
- A can of Plasti-Kote matt white to respray the interior panel of the skylight.
- Masking tape and newspaper for the respray work.
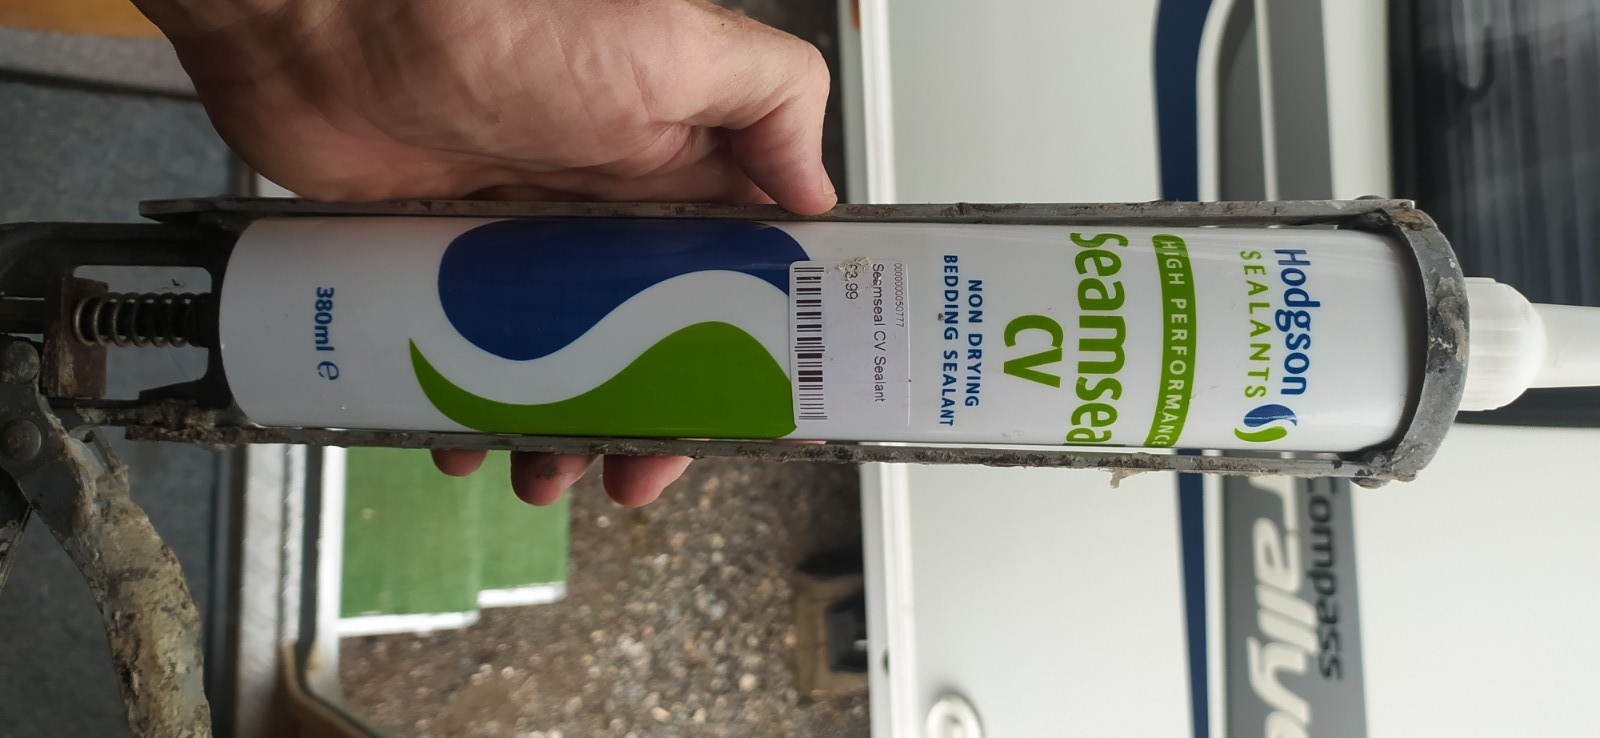
The Best Motorhome Skylight Sealants
When researching the job I came across a few differing (some quite strong!) opinions on which sealant to use. These three were the most popular:
- Sikaflex 512 or 522 (available on Amazon) – this is a setting sealant, which also acts like glue. You need an applicator gun to squeeze it from the tube.
- Seamseal CV (available on Amazon) – this is a non-setting sealant (it never goes hard). It comes in a 380ml tube so needs a long (400ml) applicator gun.
- W4 Mastic Sealing Strip (available on Amazon) – this is a non-setting sealant on a tape, so you don’t need an applicator gun to install it.
In the past I’ve used Sikaflex to install a solar panel and a smaller Mini-Heki Roof Light, but this time opted for Seamseal. Why? A few reasons:
- I thought a setting sealant might make it difficult to remove the skylight in future. Normally I’d just cut the sealant away from underneath with a craft knife, so it wouldn’t matter if it was set like glue. In this case I was worried some would make its way onto the plastic trim inside the van, maybe making it hard to remove without damaging it.
- Seamseal’s £7 a tube with delivery, about half the price of Sikaflex.
- Seamseal had tons of positive reviews on Amazon.
- I’ve already got a long applicator gun (if you need one, they cost about £6).
- The W4 tape looked less messy than using a tube, but I wasn’t convinced I’d get as good a seal with it.
Removing the Skylight
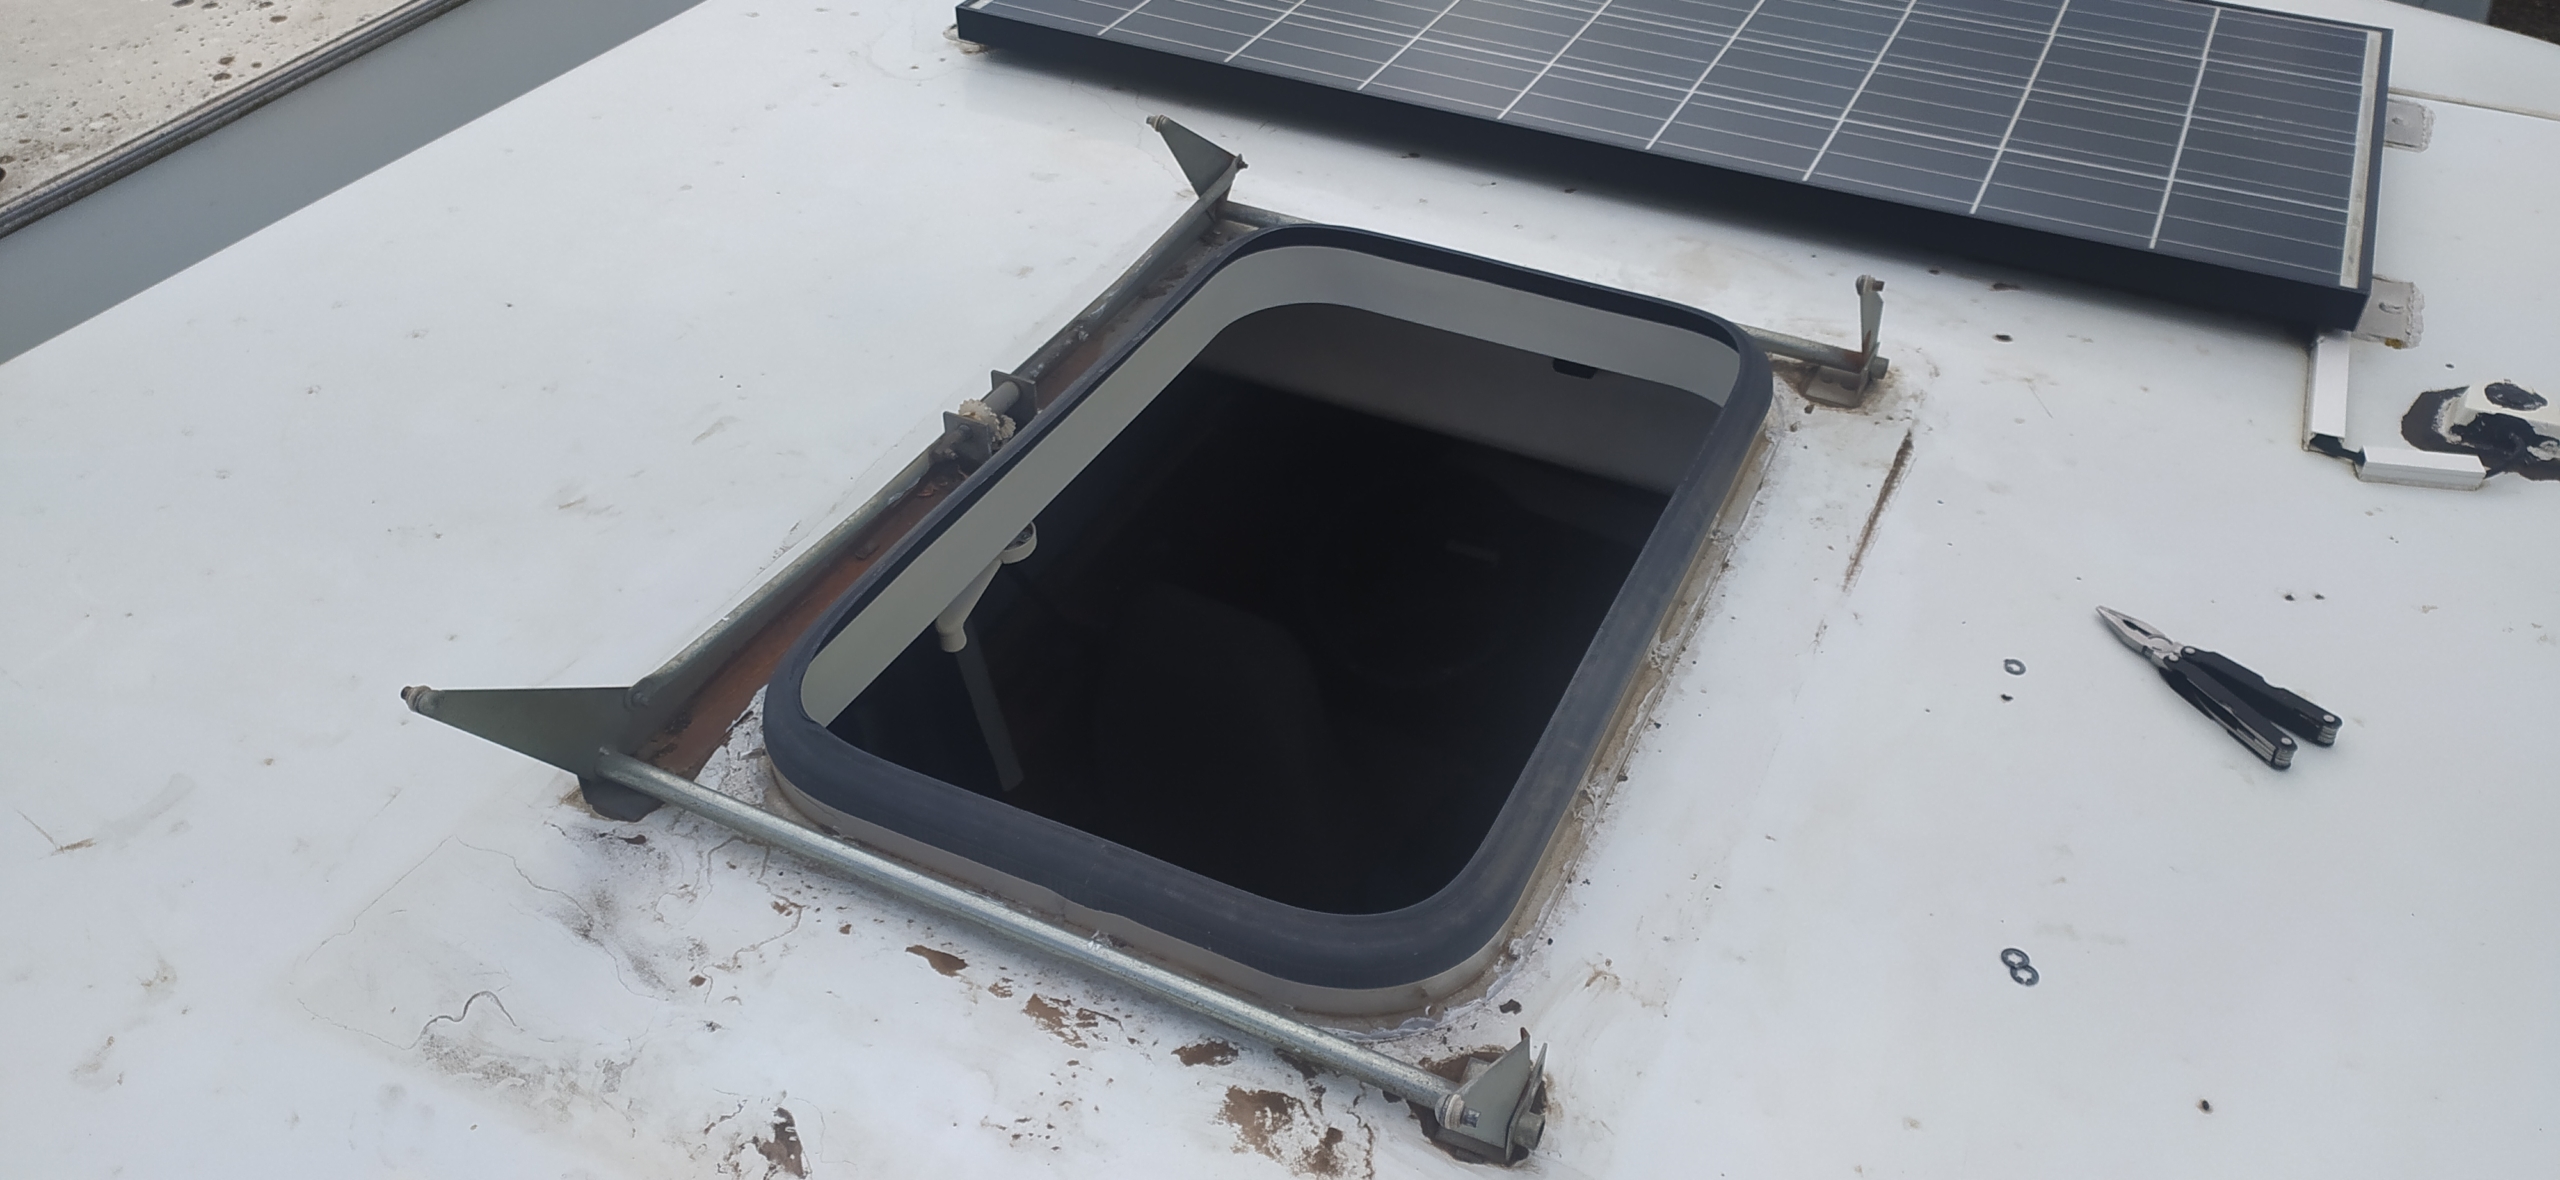
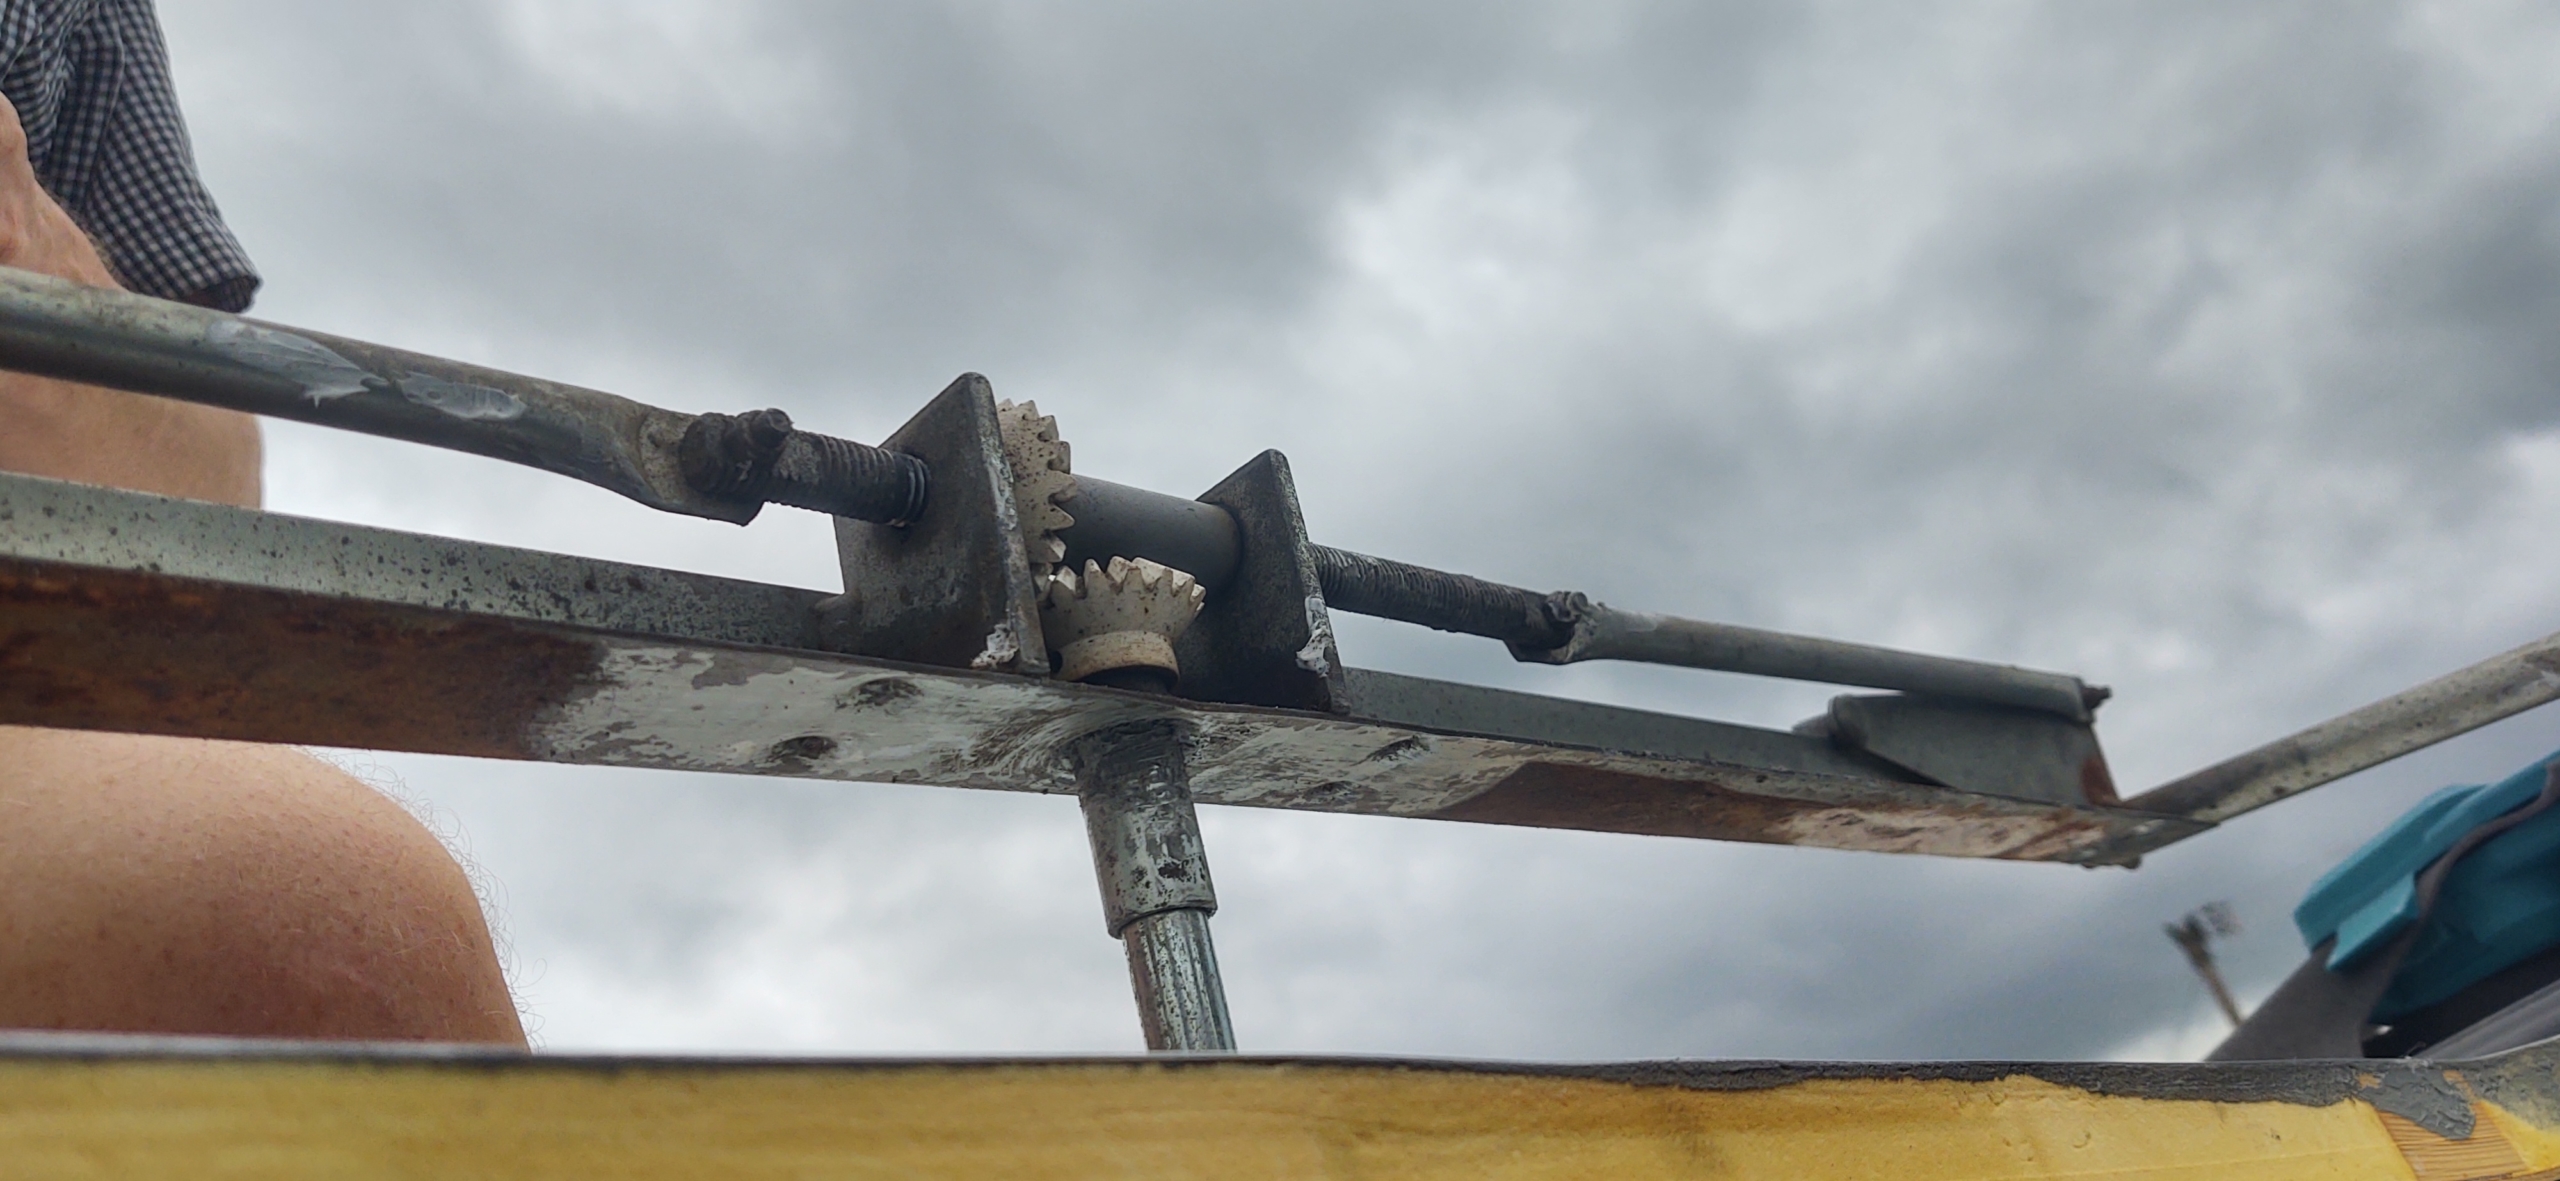
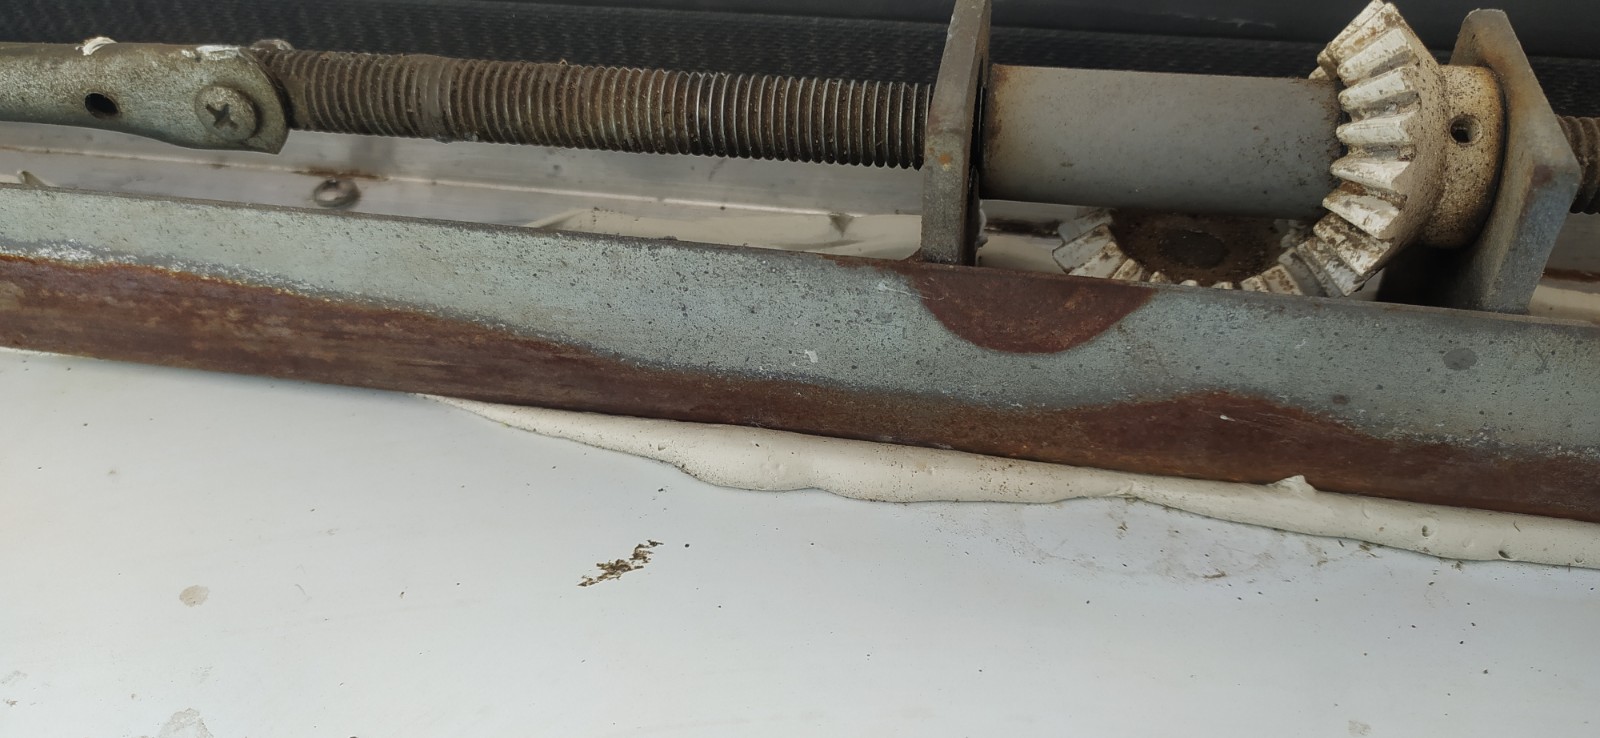
Our smaller skylights are held in place from underneath, secured to a panel inside the van. The large skylight on our 2001 Hymer B544 isn’t installed like that though. It has a metal surround on top of the van which is screwed down onto the roof. A separate metal assembly is also screwed to the roof around the skylight, which is used to raise and lower the plastic window.
As we wanted to respray the yellowing plastic of the underside panel I opted to remove it anyway (these steps are marked Optional below), but that wasn’t needed to get it watertight again. These are the steps to take:
- Check the weather forecast! (OK, I forgot to do this and had a mild panic when grey clouds started to gather just when I had a massive hole in the roof)
- Fully open the skylight.
- Remove the screw from the winder handle and gently pull the handle off the splined shaft sticking out the panel.
- Optional: Remove all the screw caps from the underside panel and remove the screws.
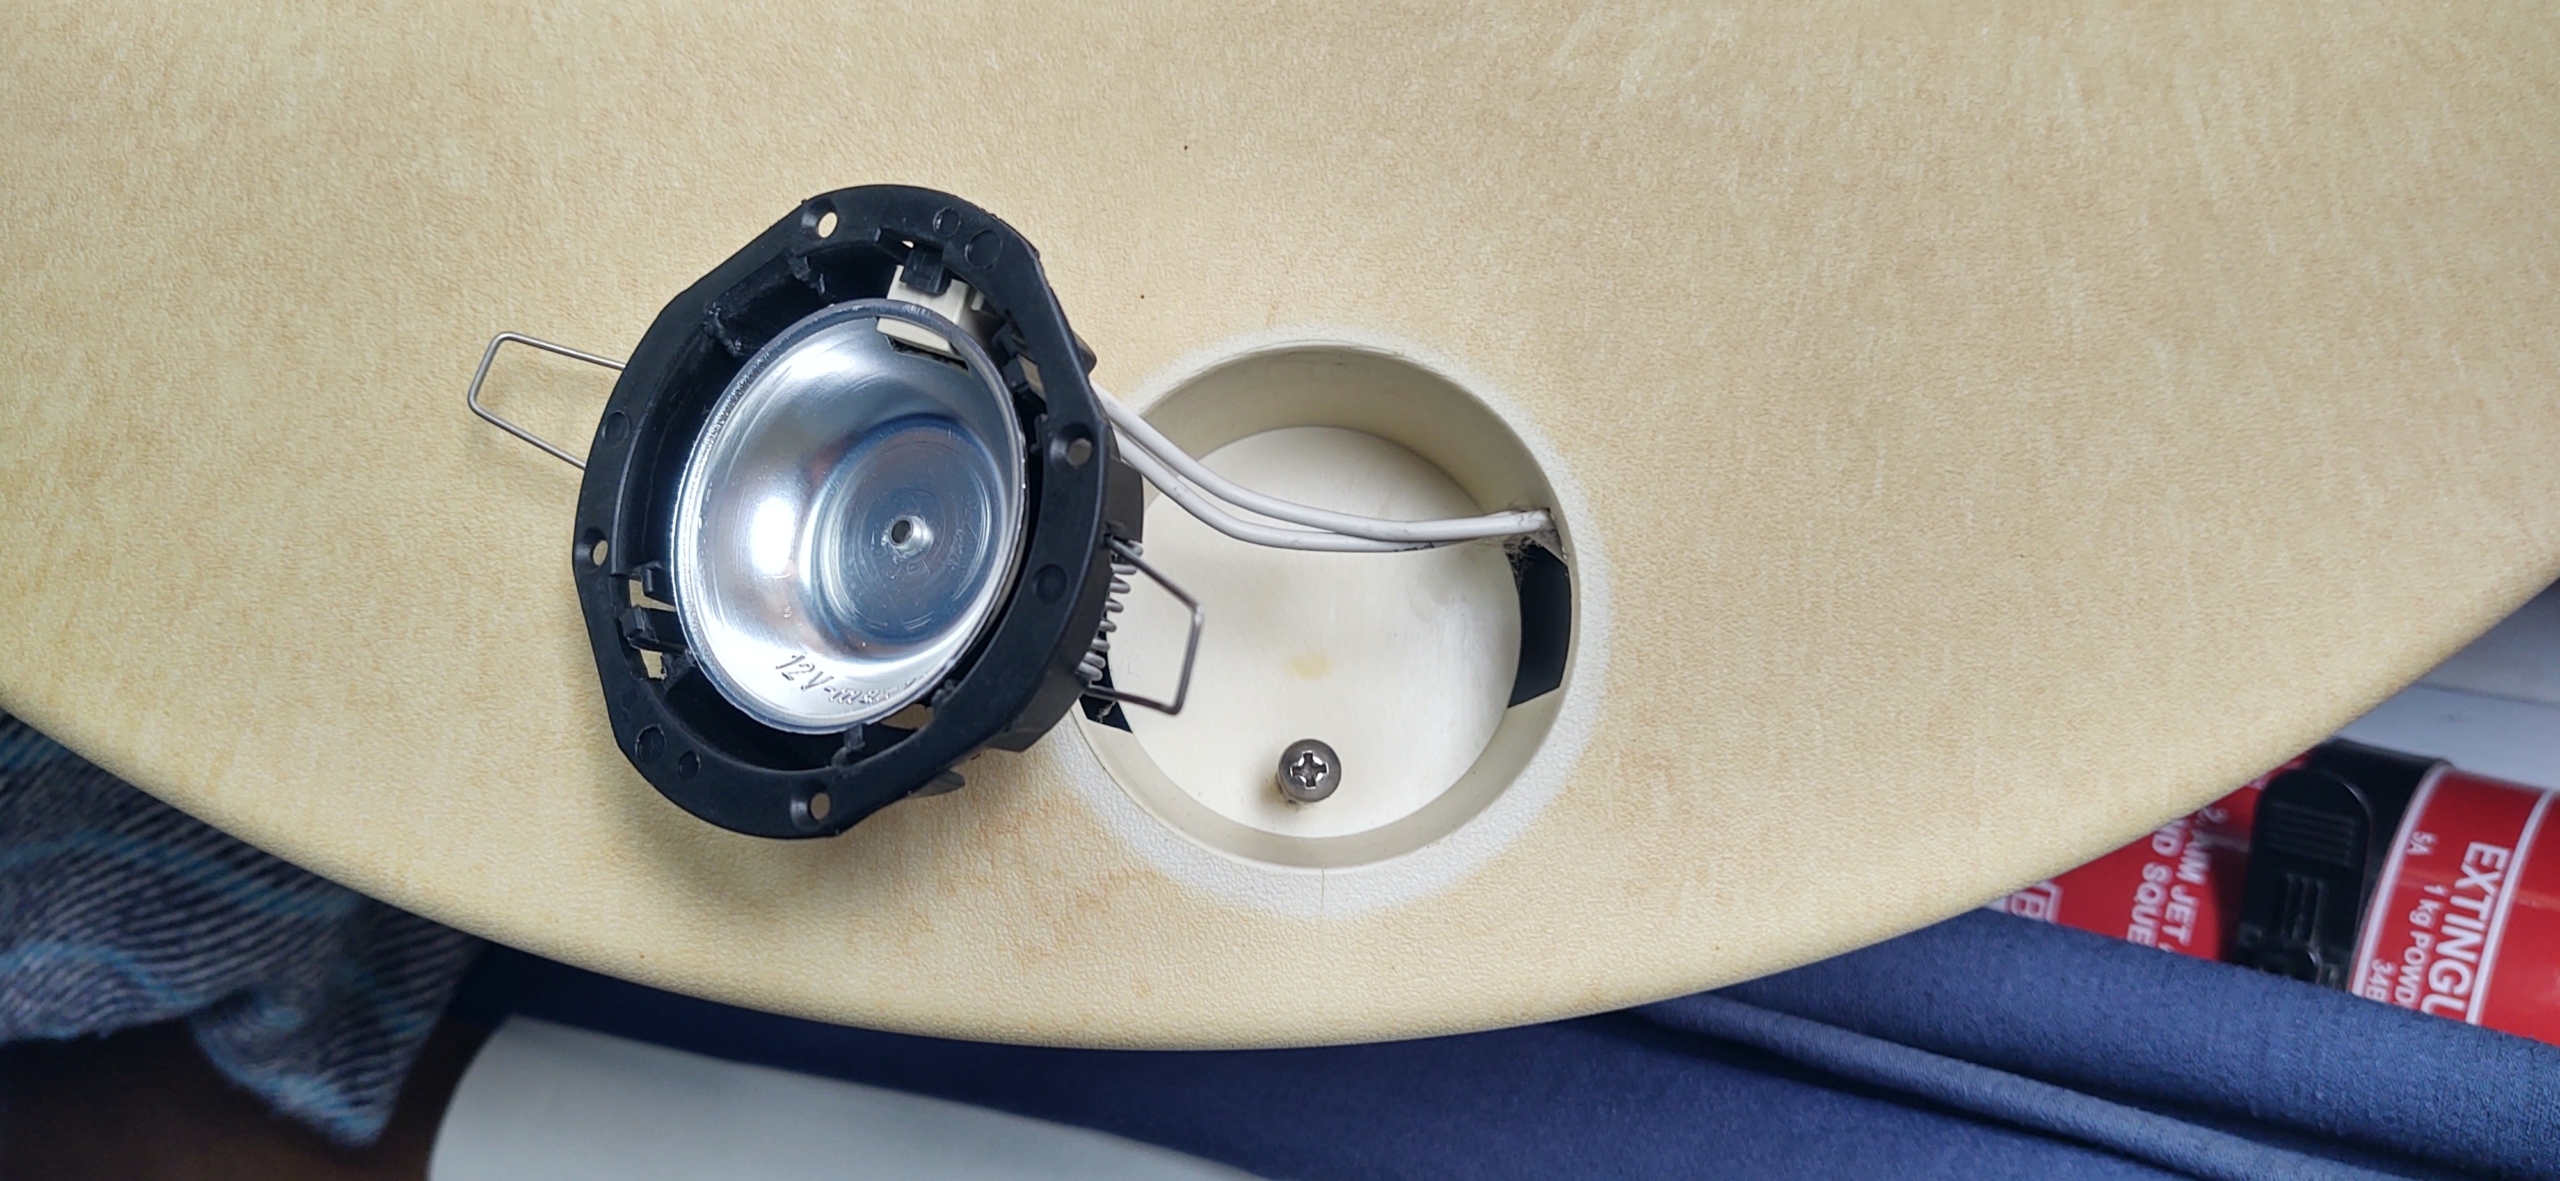
- Optional: Remove the light covers from each side, just by twisting them by hand.
- Optional: The lights are in surrounds which are held in with springs. Gently pull the black plastic directly downwards and they’ll come out. This exposes the final two screws holding the panel on, one under each light.
- Optional: Unplug the lights from behind by pulling the connectors apart (easier said than done, but they do eventually separate).
- Optional: Get someone to hold the panel while you remove these last two screws and drop the panel down.
- Optional: This exposes the interior surround for the skylight. Remove all the screws, it won’t come away yet as it’s held in by the black rubber window seal.
- Get the ladders out and take to the roof. Please be careful folks, it’s a long way down.
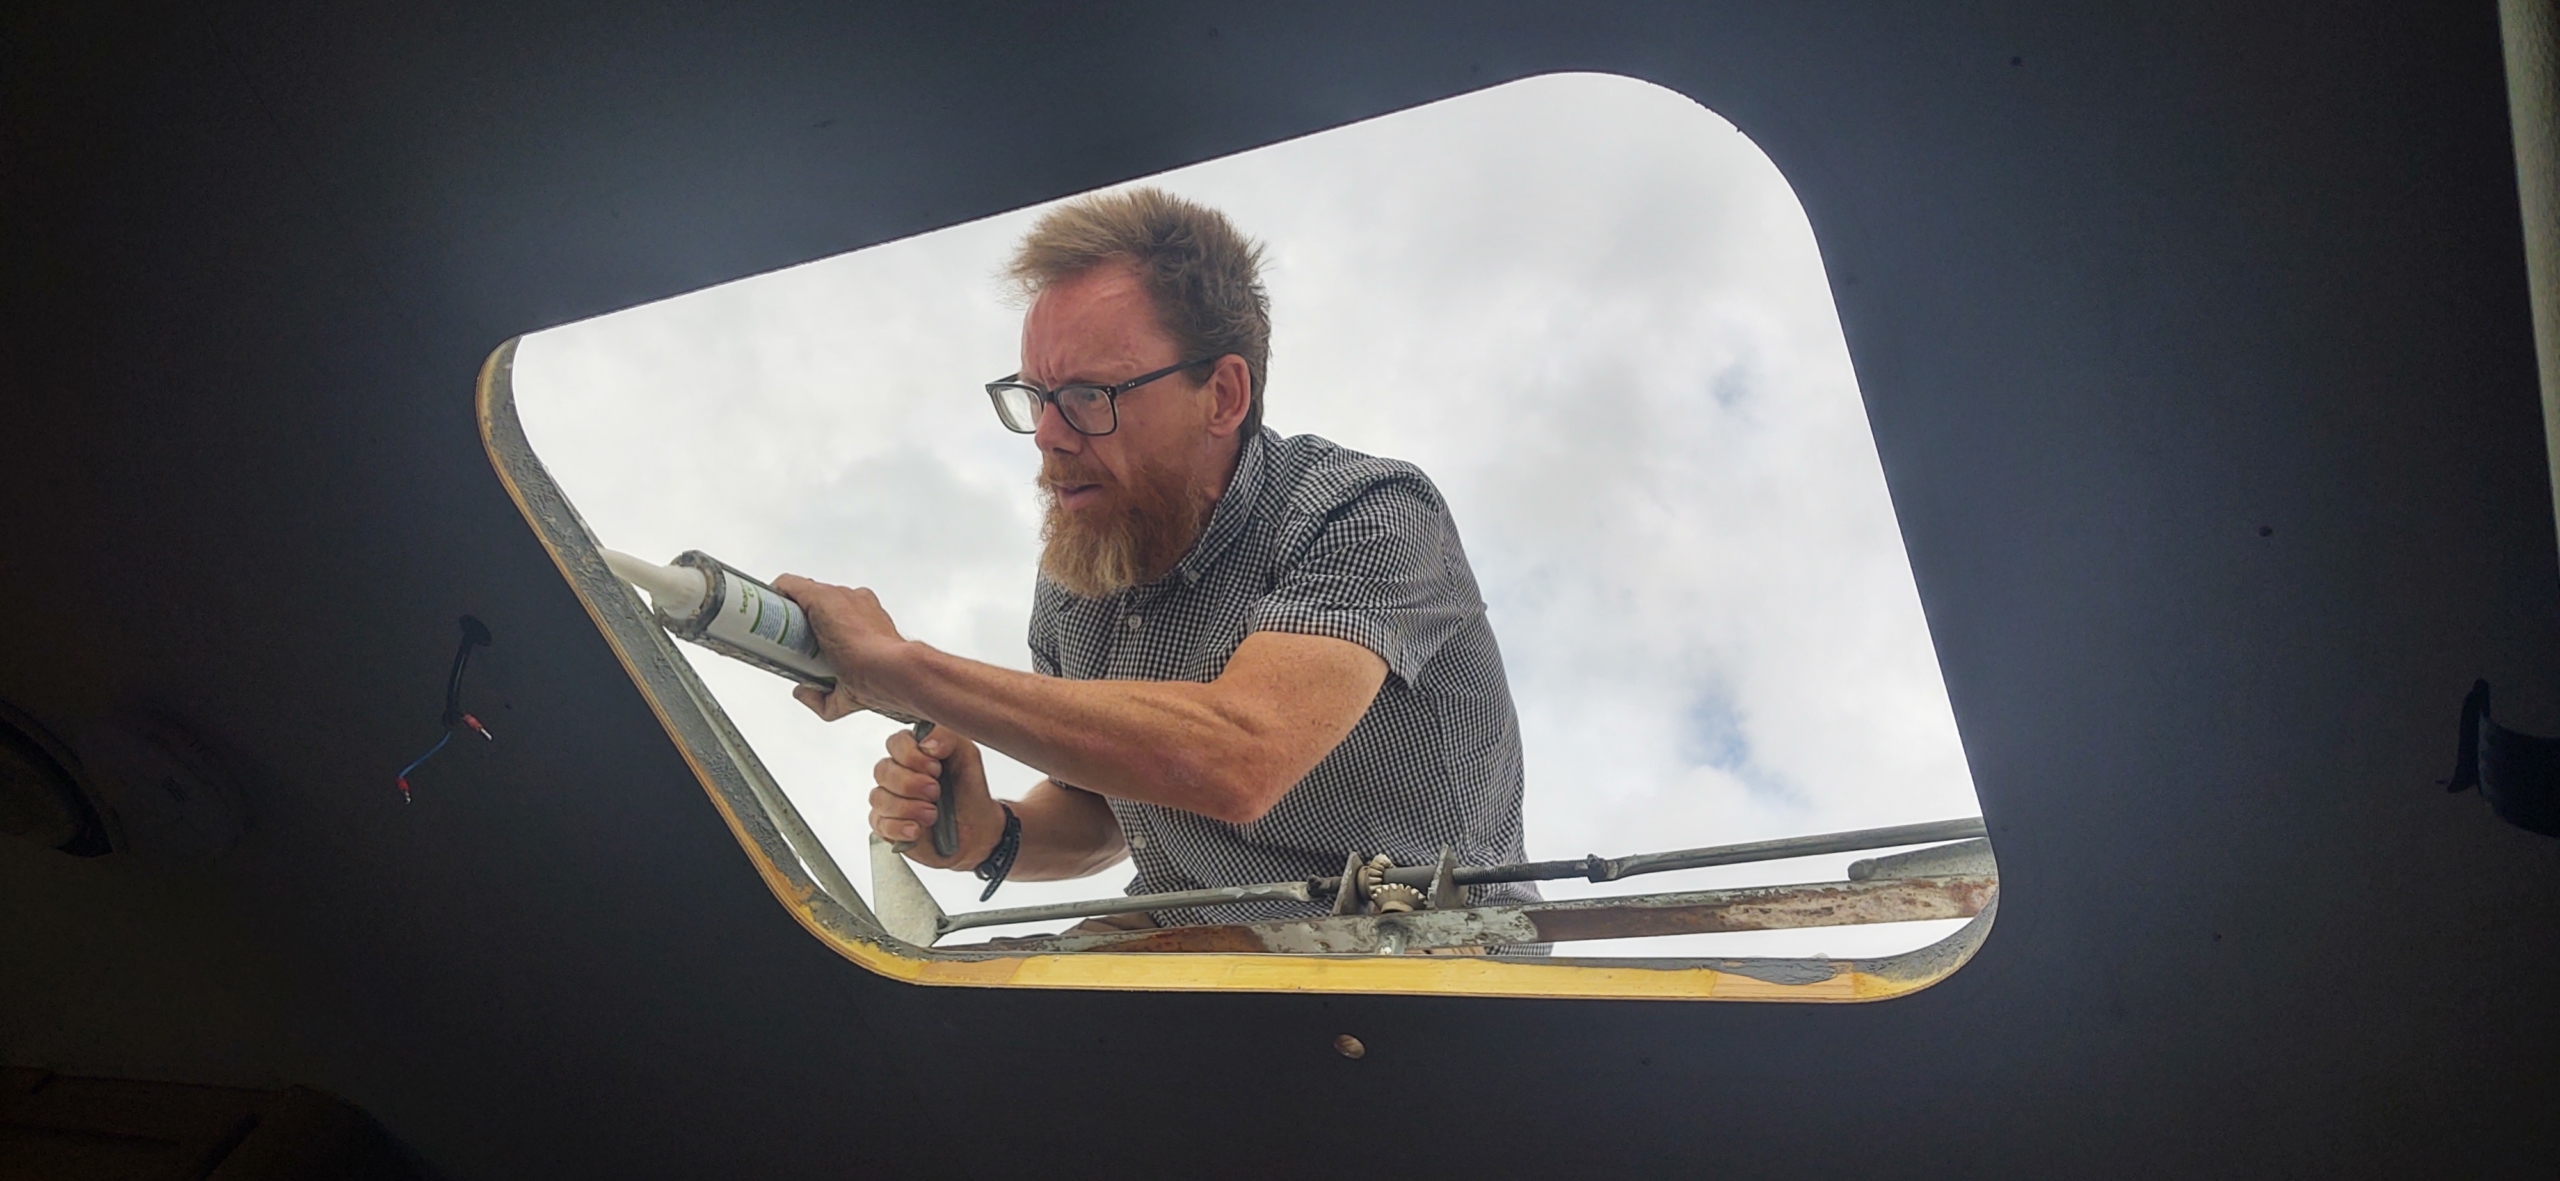
- Use pliers to break the four starlock washers which hold the plastic window on.
- Carefully remove the window (it’s huge!) and pass it to someone inside the van for safe keeping.
- Carefully lift off the rubber seal. This holds together the metal surround on the roof and the plastic trim inside the van. The plastic trim on our van was brittle and some (thankfully unseen) parts snapped off. Put it somewhere safe.
- At this point I popped down and fibre-glassed some small cracks in the plastic window.
- Back on the roof, remove all the screws holding the metal surround and raising mechanism.
- Use a craft knife to ‘cut’ between the metal and the roof to weaken the old sealant.
- Lift all the metal free of the roof.
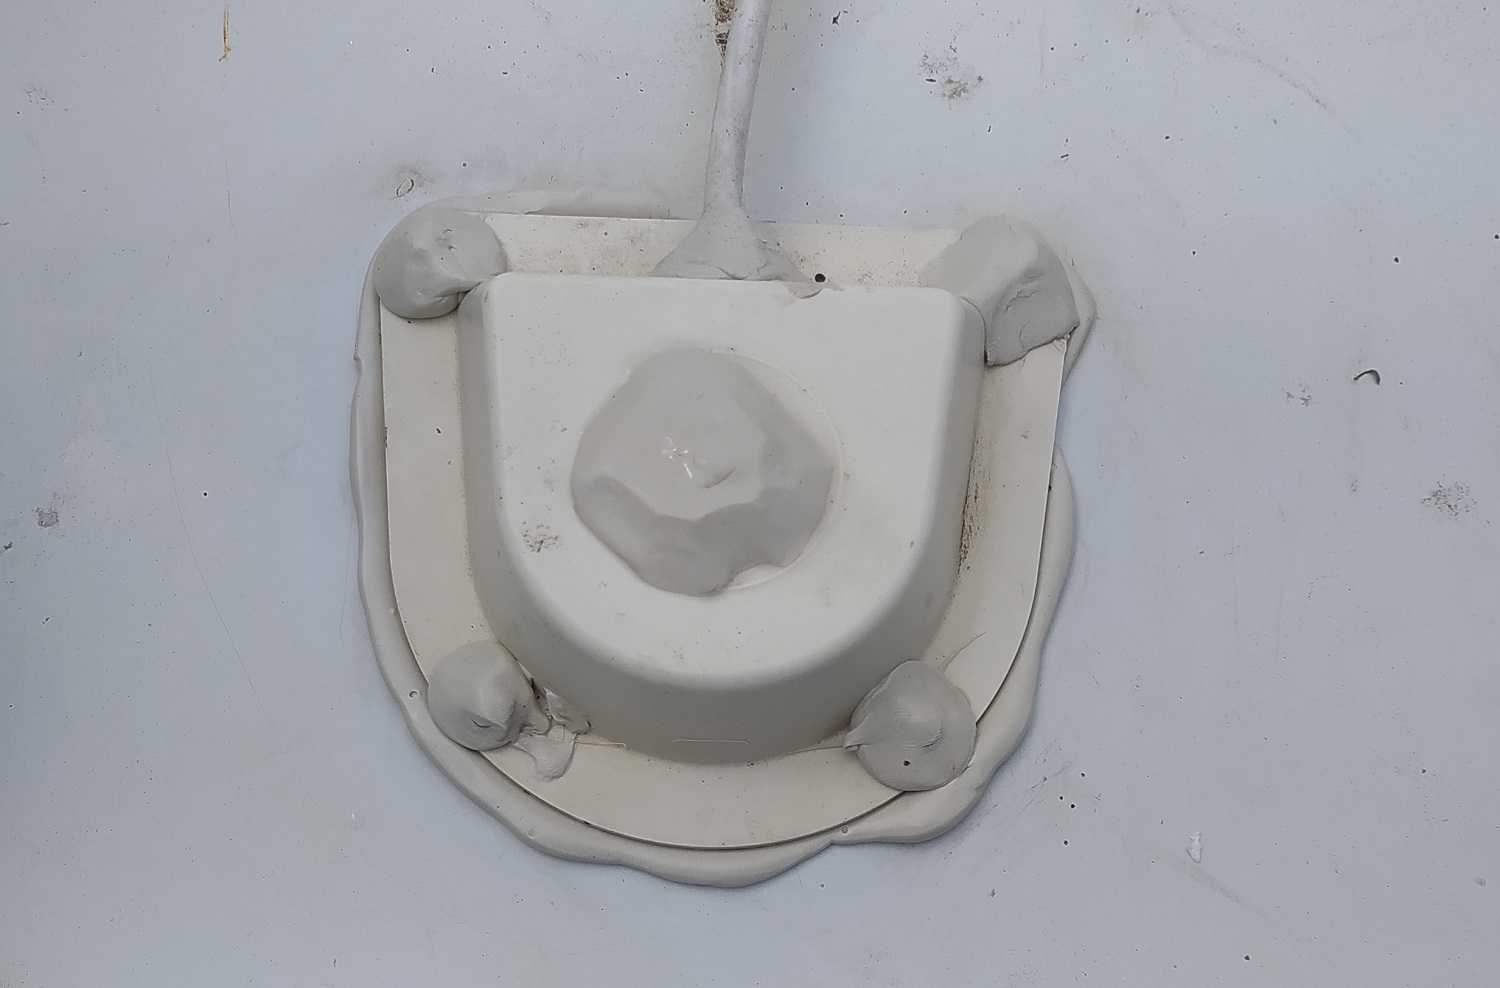
- Engage in gorilla warfare with the old sealant to remove it all. This is a messy job, no doubt. I used craft knives to cut most of it away, then a metal scourer pad to get rid of the rest. I silently swore quite a lot at this stage of the game, especially as those rain clouds gathered above me.
- With all the old sealant gone from the roof, the metal skylight surround and the underside of the winder mechanism, clean the area where they go with alcohol wipes.
- Once these areas are dry, cut the nozzle for the sealant to create a roughly 8mm hole. Then squeeze a good bead of it all the way around the skylight, around the winder handle hole and around anywhere there are screw holes in the roof.
- Pop everything back in place and screw it back down. Tighten the screws at opposite corners to avoid squeezing all the sealant out.
- Optional: Reinstall the plastic trim from inside the van.
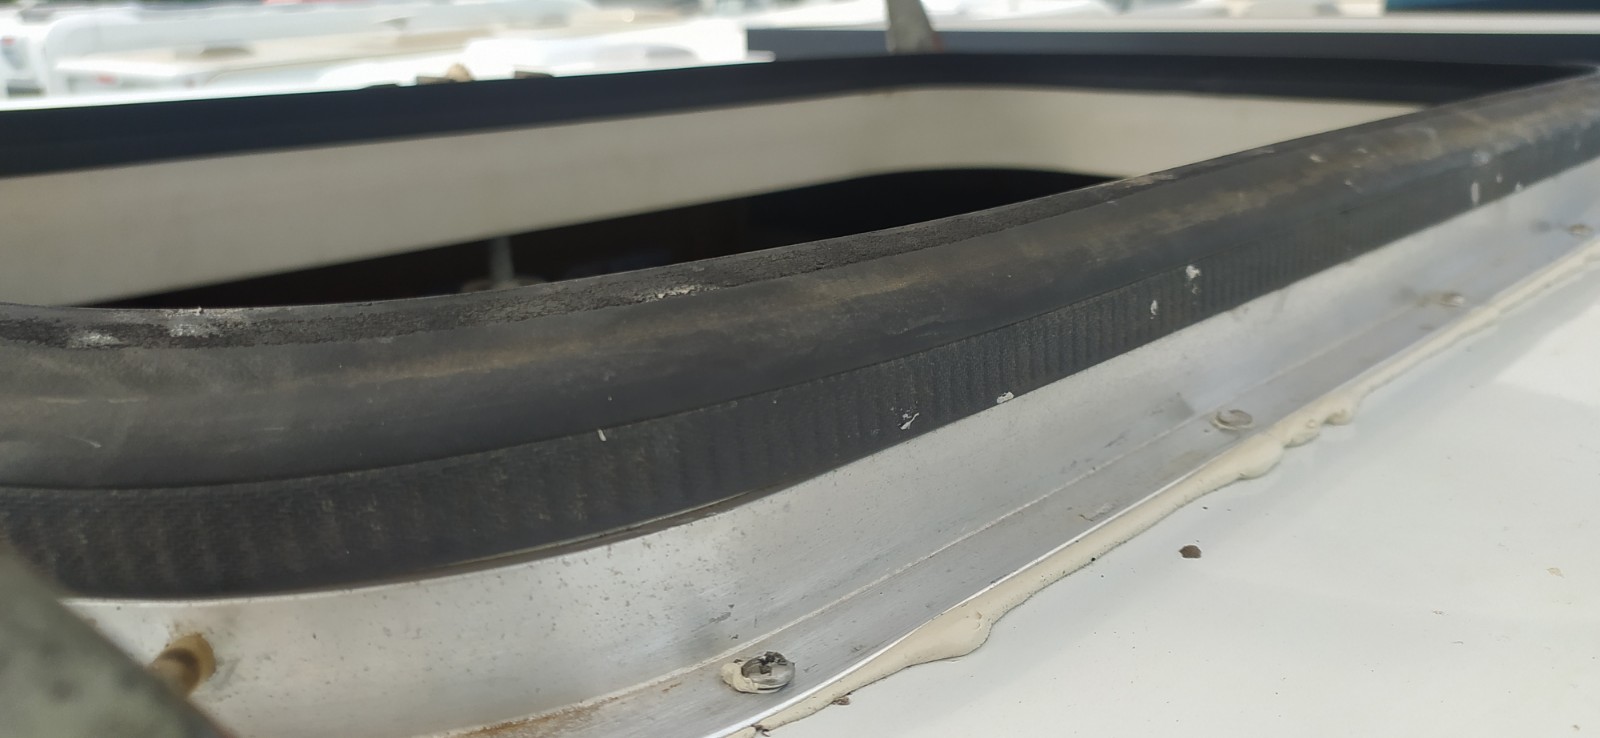
- Carefully push the rubber seal back on.
- Lift the plastic window back onto the roof and re-attach it with the starlock washers. More swearing may be necessary! These don’t push on by hand, you’ll need something like a socket on an extension bar which you can use to slowly force the washers on.
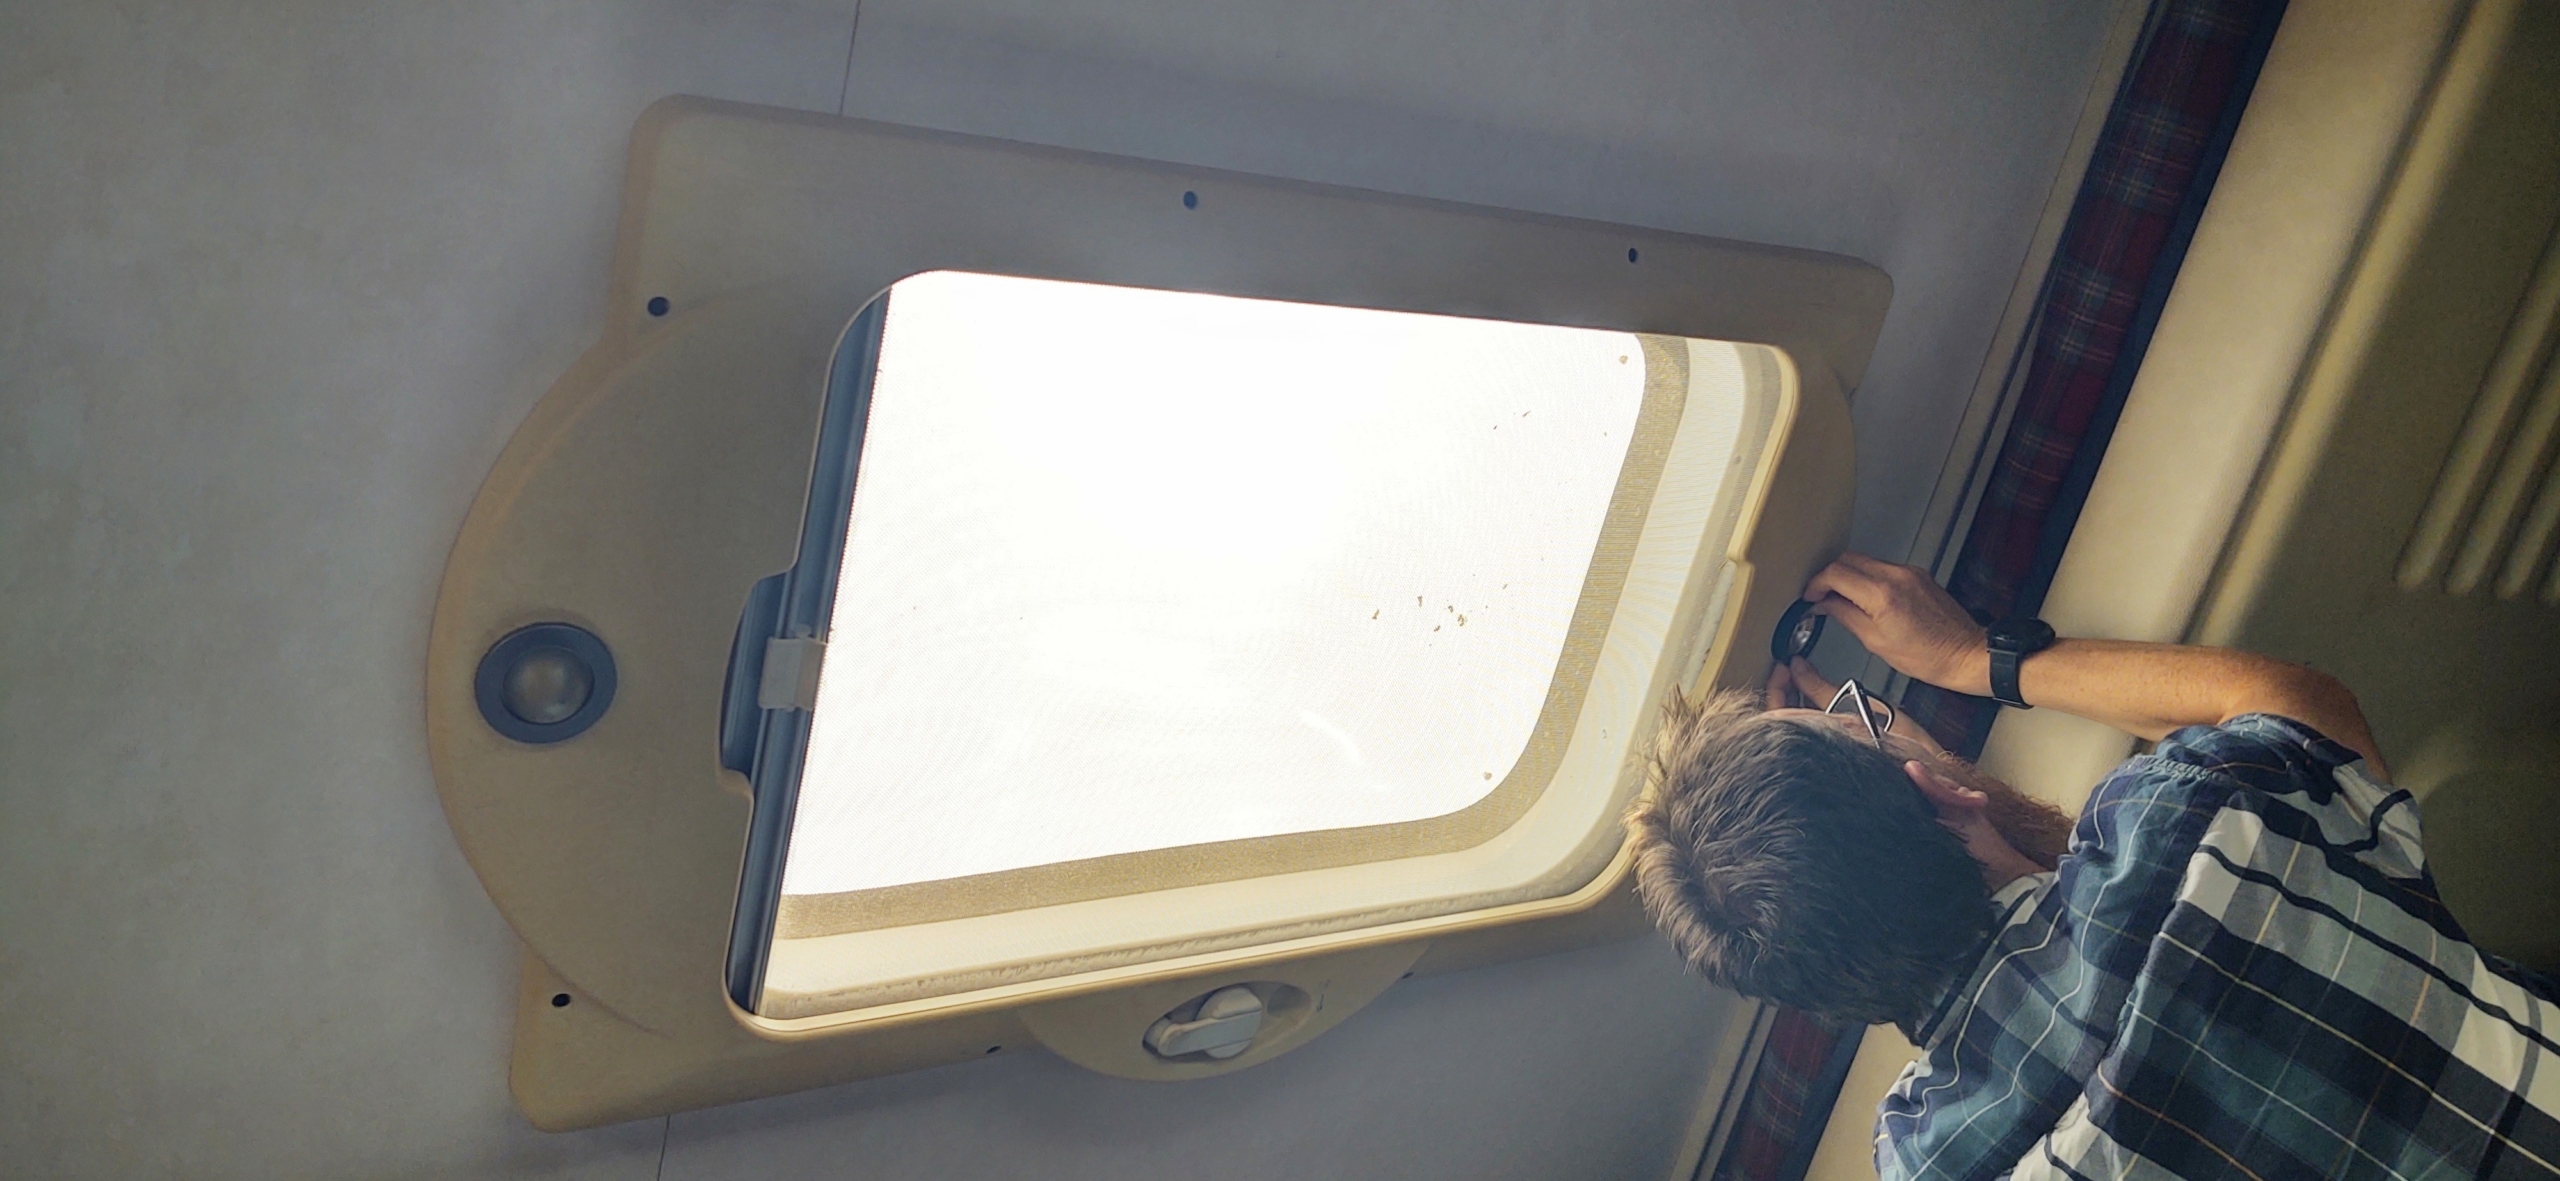
- Optional: Screw the interior panel back in place, re-attaching the connectors to the lights. Ideally this is a two person job.
- Without securing the winder handle screw, use the handle to fully lower the skylight. Remove it if you need to re-orient it so it fits in the recess, then re-install it and screw it in place.
- Job done. Tidy your tools up, scrub your hands and head for the pub/fridge/settee. You deserve it!
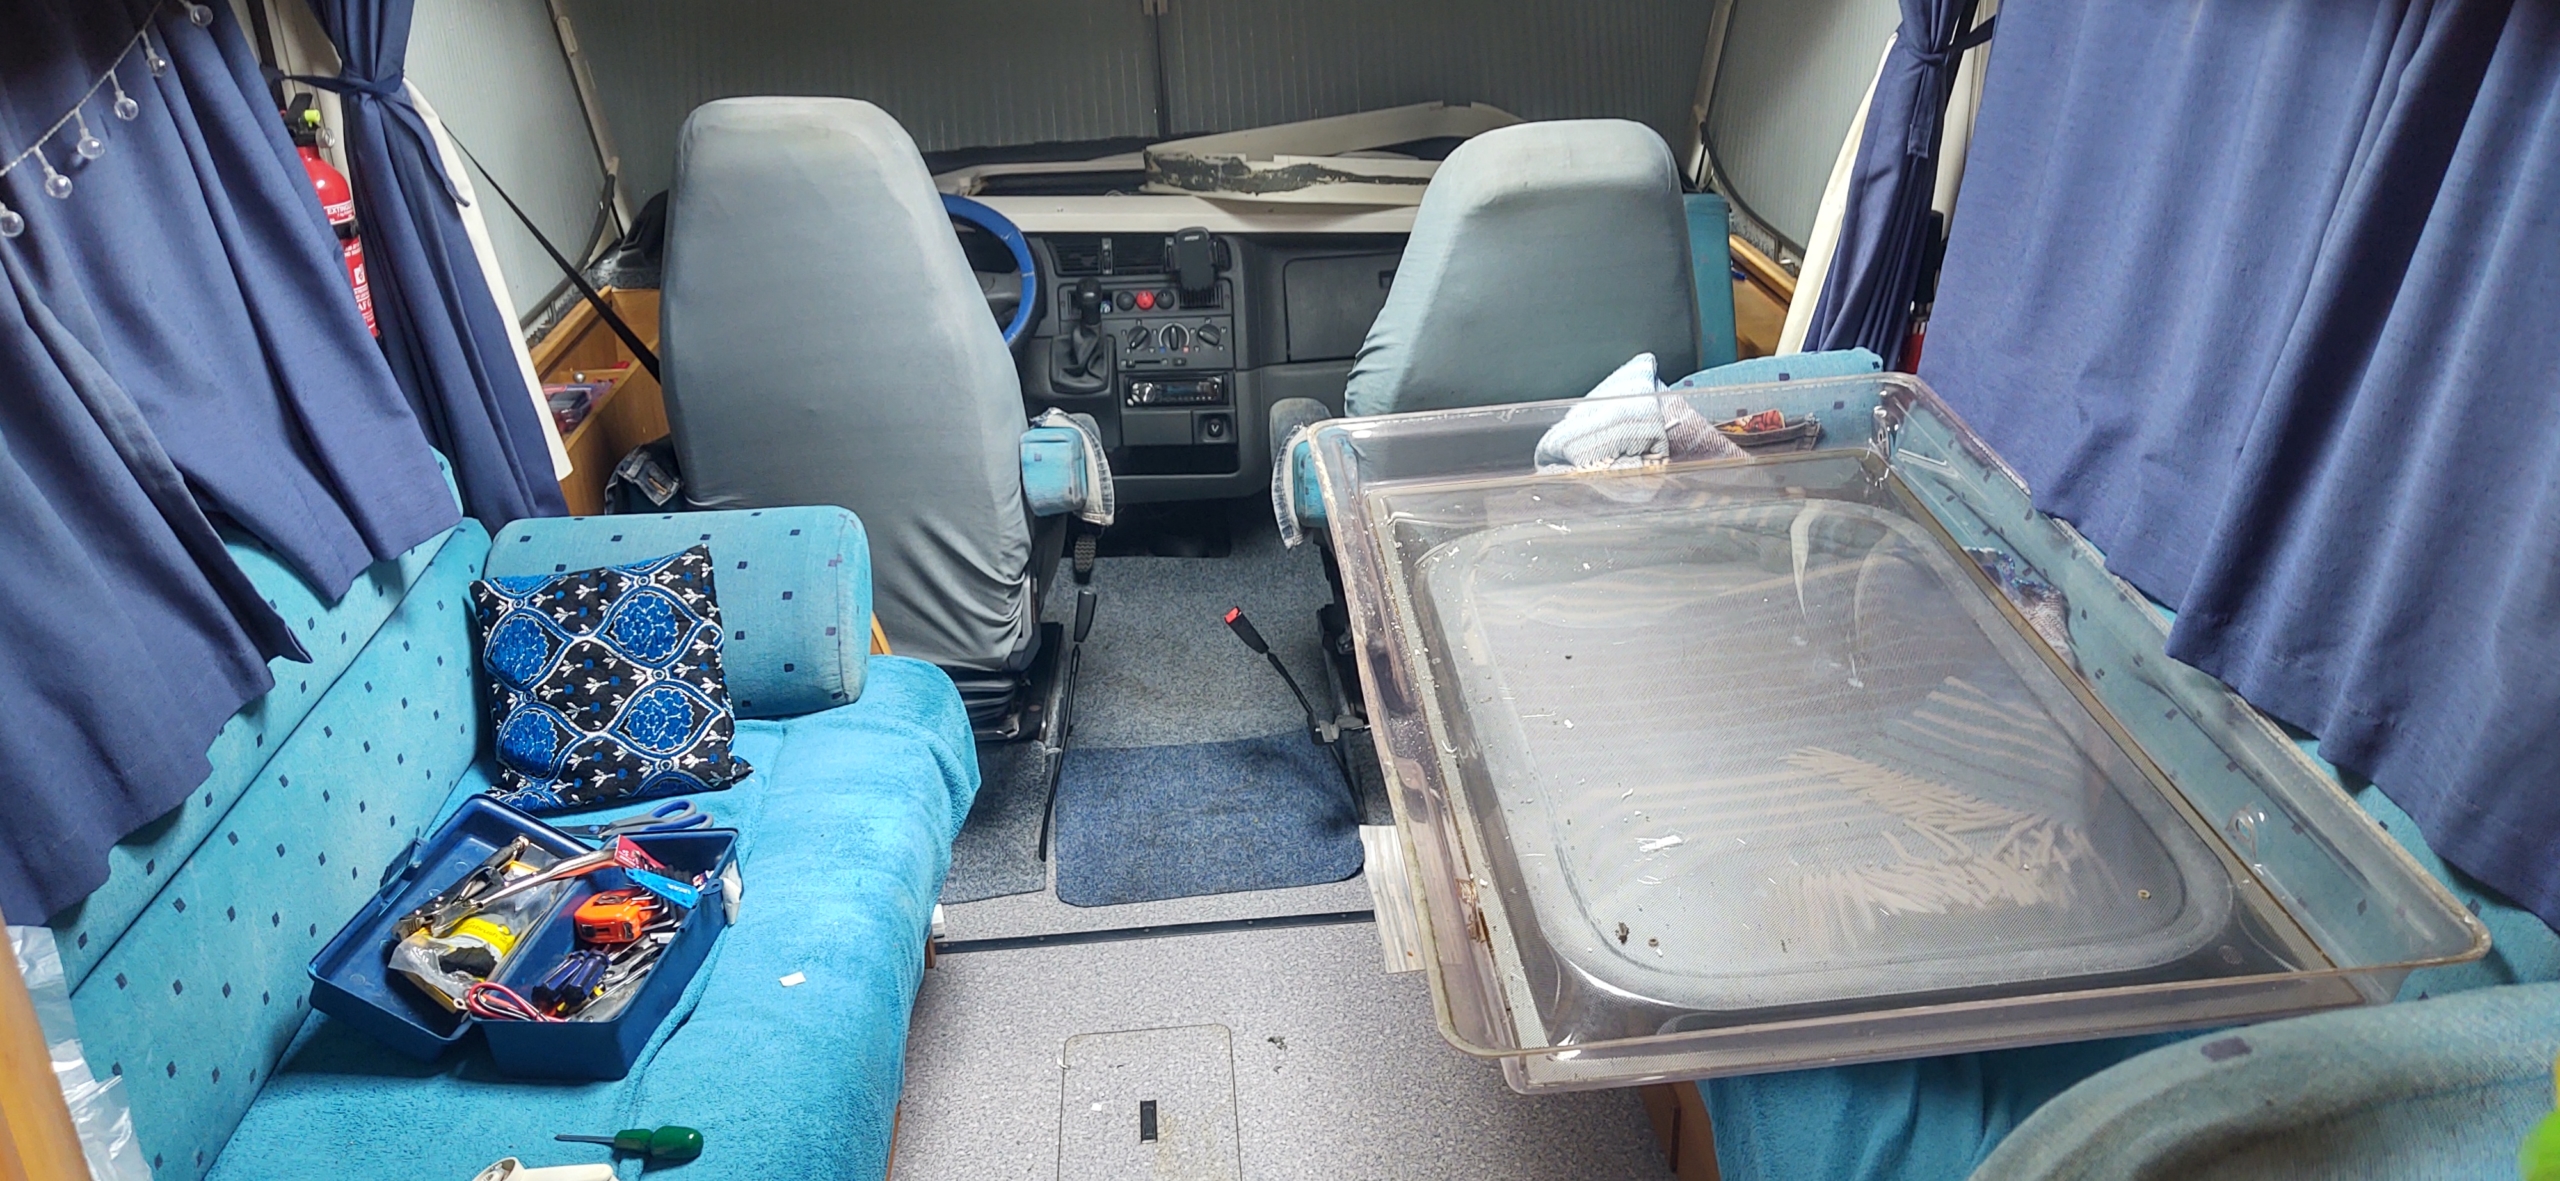
Here are a few photos of the job:
The Post-Mortem
I’d been dreading the job and I’m very glad it’s done! The skylight’s big and fairly old, and I expected something to snap or to find myself half way through and unable to get it back on, with a nasty gaping hole open to the elements.
With some research and preparation I had all the right tools and bits and bobs I needed though, and Lady Luck smiled on me. The roof needs a good clean, but other than that the skylight’s back in place and hopefully very well sealed against the elements for the next 20 years. Phew.
Update After Some Very Rainy Days
It’s since rained, a lot! Good old British summers! We’ve had some seriously heavy rain too, and the skylight has remained bone-dry. When we were up in Snowdonia an old leak re-appeared around where the solar panel cable comes through the roof. To fix it I used the same tube of Seamseal. The old ‘gland’ (the plastic cover on the roof over the hole) was stuck on with double-sided foam, which had long come loose.
I removed the gland and drilled four small holes in it for screws. I then cut away all the foam and mastic, added lots of Seamseal and refitted the gland, screwing it down just enough to squeeze out the mastic. I then realised I’d just done the Satellite TV gland, not the solar panel one, doh! So I did the solar panel one too. Both have stayed dry during the downpours, so it looks like we’re finally watertight!
Cheers, Jay
New to motorhome life,
planning your own motorhome adventure or
looking for the perfect gift for the motorhomer in your life?
Check out our OurTour range of books.


We can recommend Pro Guard Liquid Roof, which is a paint-on white EPDM rubber roof sealant. It’s not cheap but well worth it in our opinion.
We had a long-term problem with leaks around a skylight in our previous van. Basically, siting a skylight in the “ridged” area of a panel van roof seems to be just asking for trouble.
We tried everything (including Sikaflex etc), and the one thing that finally did the job and lasted was the EPDM – and we didn’t even have to remove the skylight (again 🥴) to apply it. We basically just cleaned the surface up thoroughly and then rubberised round the edge of the skylight and the surrounding section of roof between solar panels (which, given that it was white EPDM on a white roof looked pretty tidy). Job done…. and not a drop of water ingress ever again 😃
Excellent, I’ve not heard of EPMD rubber sealant, thanks for the info and really glad it worked for you guys – no fun having water getting in. Cheers, Jay
Hi Jay,
Thanks for your detailed step by step guide. I have recently developed a leak on my B584 which has the same skylight as yours if I park exactly level, with a slight fall to the offside I don’t get it however bad it rains. I have been putting off tackling this for the last month but now having read this feel more confident to go for it. Thanks
Stuart
Same here Stuart – ours only leaked when water pooled on the roof when we were dead level. I put the job off too but I feel much better now it’s done. Best of luck fella, Jay
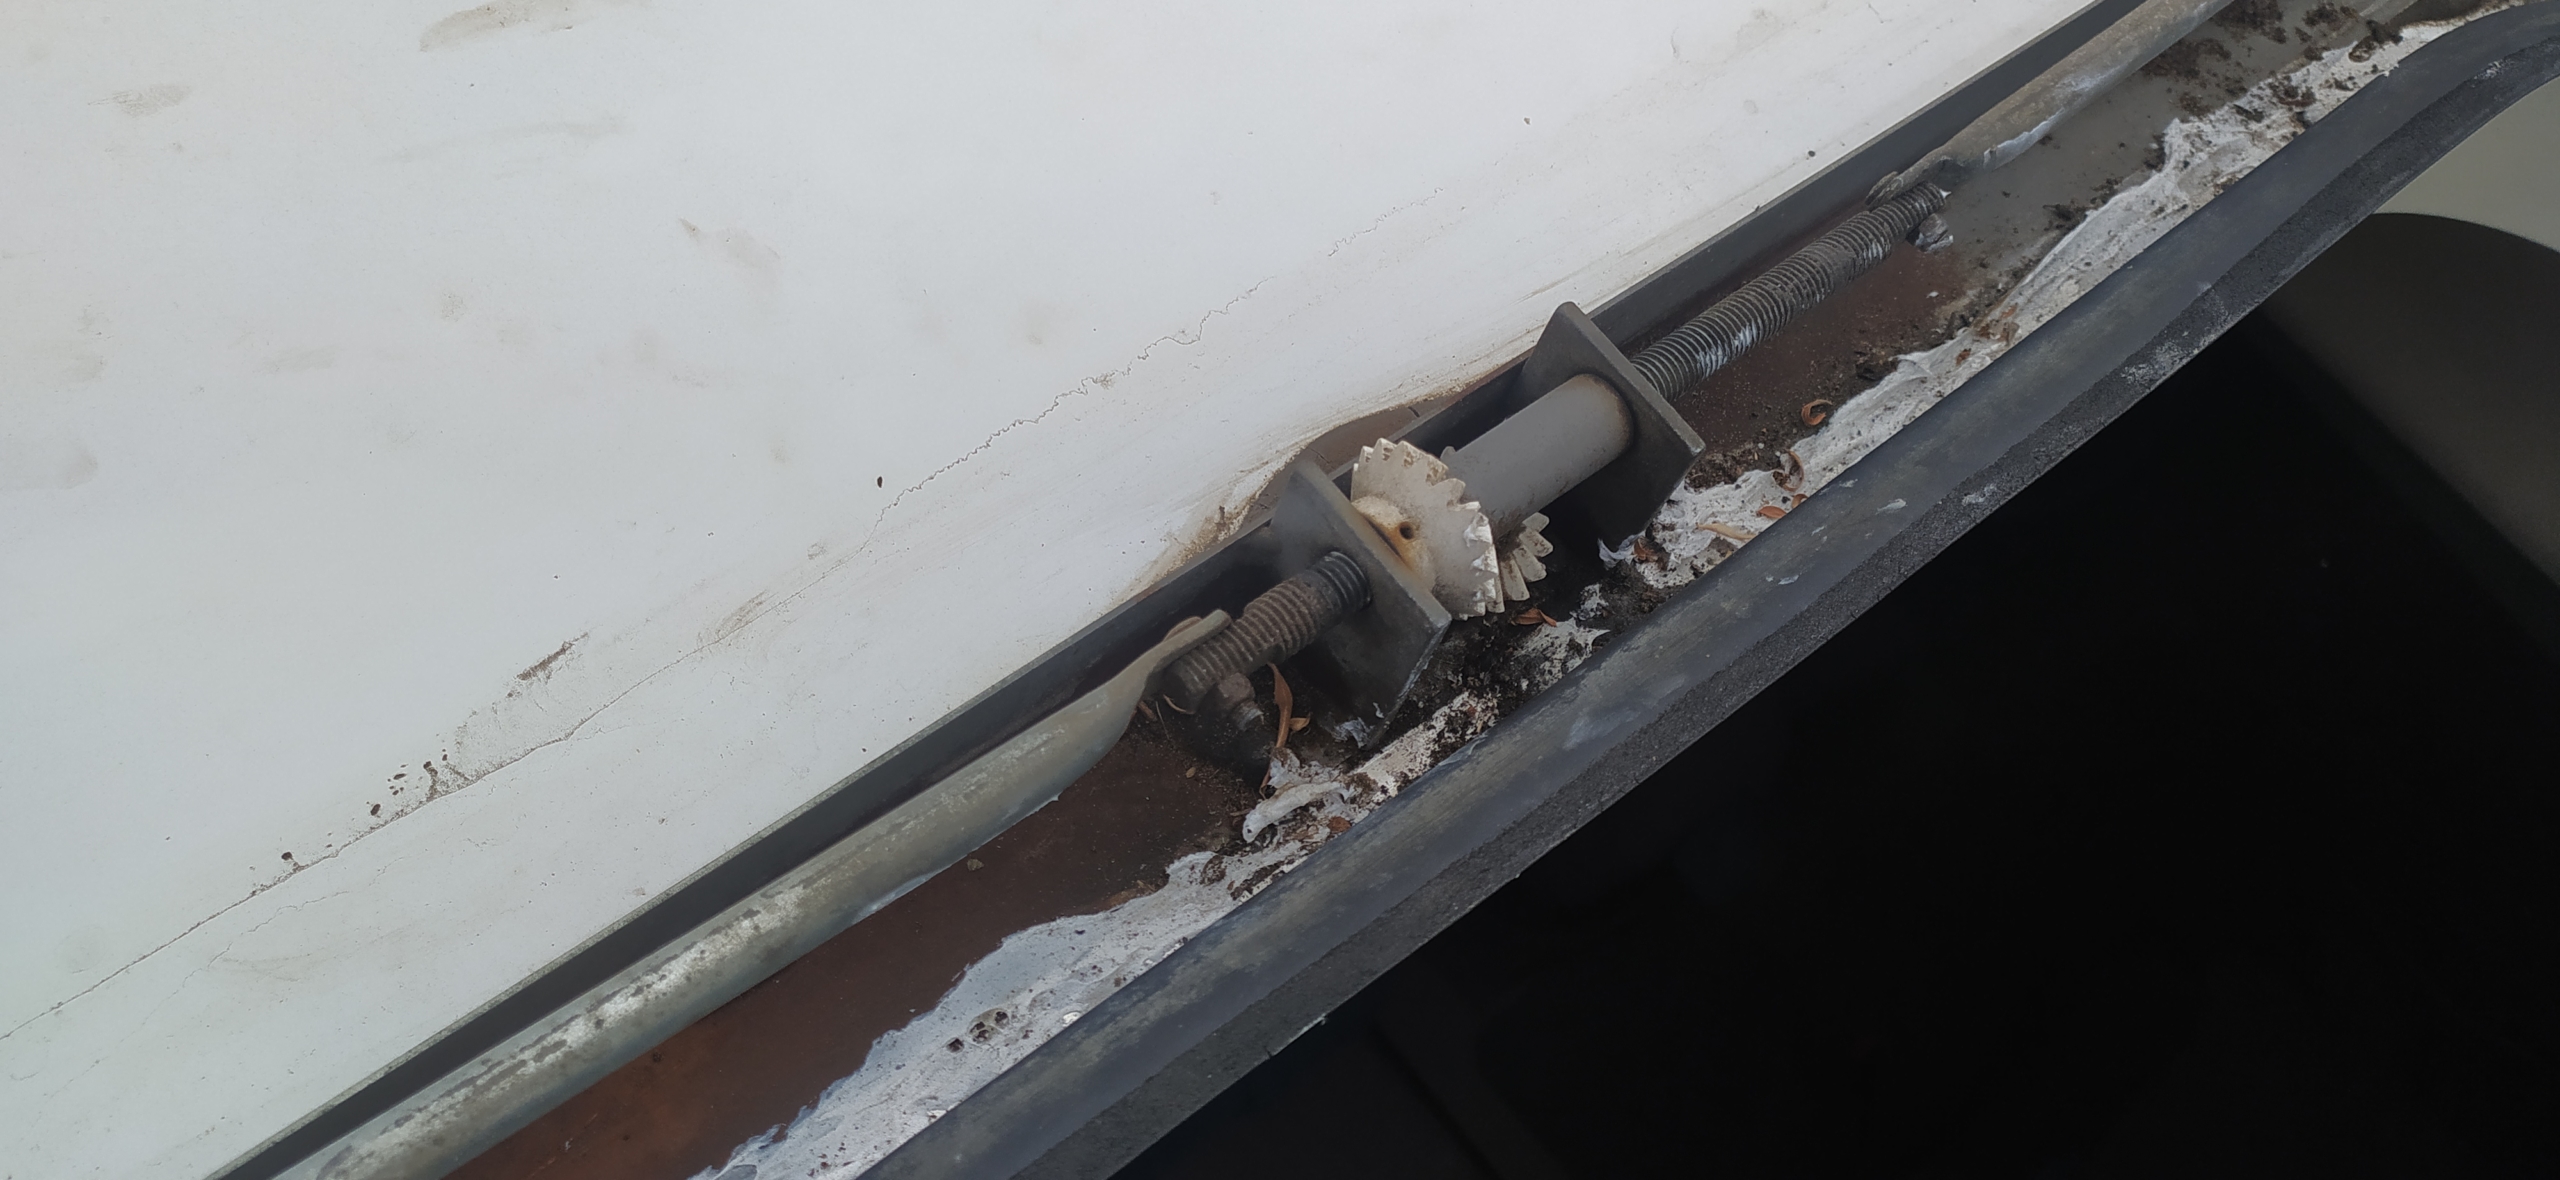
We have the same problem with our 2001 hymer but I found it was leaves collecting around the gears of the winding gears causing tracking in bad rain, but I am still considering a reseal when I get around to it
Hi Jon
Yep, it’s a messy little area around the winder mechanism. Our seemed to be sealed OK on the outside of the metal strip holding the winder down, but if water flowed in between the winder metal base and the edge of the skylight then it would drip inside. That only happened in very heavy rain for us, and when we were completely level in the van. It still played on my mind that we might be getting some water damage in the roof though so I’m glad I resealed it.
Best of luck fella, Jay
Hi Jay, really good description of how you did it.
I did not see you testing it with a hose or watering can, or are you confident you fixed it?
Anyway thanks for the tips.
Happy days to come,
Regards
Richard
Hi Richard.
I’m 100% confident(ish) it’s fixed(ish). :-)
Seriously though, I’m pretty certain it’s sorted. It never crossed my mind to try and test it to be honest. If it rains and leaks, I’m only in the same position as if I tested it and it leaked, so I’ll wait for some heavy rain and see what happens. I’m not sure what I’d do differently if it did happen to leak, I prepped the surfaces carefully, researched the right mastic to use, made sure I used enough and in all the right places.
I’ll update the post after we’ve had a few heavy downpours.
Cheers, happy days to you guys too, Jay
I also suggest lubricating the gears and thread with grease.
Piotr
Good advice Piotr, thanks! Jay
Thanks for this. I have a similar but 2005 rooflight which had me head scratching on how to get the trims off to get to the screws. It amazed me that not one part of the interior broke. Now just need to get a new interior trim as it’s breaking down before tackling the removal. I just hope it’s leaves as we got perhaps half a cup of water after a 1 hour deluge so seems it’s not too bad. If not this will help. Think I might go down the w4 route as it appears easier to fit.
Cheers Malc, good luck with it fella. Jay
Hi. All done, thanks for the help. I didn’t use the W4 for the frame due to the bend so used the tube. Not sure how much to put on so hopefully it’s enough.
Great stuff. I put enough mastic that it slightly oozed from the sides when I screwed the surround back down. As long as there’s enough to get a good seal all round it should be good. Cheers, thanks for the update, Jay
Hello Jason – great guide.
I’m doing the same thing after trying to just put more sealant over leaking areas which failed after a couple of months.
One question – how did you get the black rubber seal off? Mine seems very stuck on and looks like I need to pry it away from the plastic inner sleeve, however when I started to do this it seems to distort the part that grips on, and looks like it’ll be a mess when I get to the point of putting it back on.
Any tips greatefully received.
Julian
Hi Julian
I was lucky and it just came off – the inner sleeve was very brittle too.
Best of luck with it, cheers, Jay
Thanks Jay – yes, I’m quite concerned about old/brittle plastics
great instruction’s you should do caravan repairs for a living . As some of the pro that do it for a living are cowboys and charge a bomb.
Cheers Alan 👍
Well, I be been meaning to post this for over a year as your post was invaluable last April.
We were (and still are) new to motor-homing and bought a fabulous Burstner to start our travels when I retired (our long term plan). Sadly the main skylight leaked in the rain but we didn’t find this out until after the dealer’s warranty expired and they wanted an extortionate amount of money to deal with it,
I then found your blog, bought the sealant, waited for a dry day and took on the job myself. Really pleased with the result. We spent last May travelling round the Scottish North Coast, stunning scenery, beautiful beaches and fantastic overnight stopping places.
There was also some horrendous weather at the end of our trip on Skye, 50mph winds and torrential horizontal rain. But the skylight seal held firm and we were completely dry.
We’ve since toured all corners of the UK (Ireland is on our list) following more of your tips on other blogs.
So thanks and keep up the good work!
That makes the effort of writing these blogs 100% worthwhile, many thanks Glyn and happy (dry) travels! Jay
Thanks for inspiration , mines a 2 berth hymer ,nova same system,as yourself same leak area too,winder area, I took optional route, apart from starwasher removal / sunroof all Done on steps , Again many thanks , with out your input I would have gone the ,bodge route, hardest part replacing star washers…!
Nice one Gareth, those star washers had me uttering some bad words! On the plus side ours hasn’t leaked since, job done. 👍 Happy travels, cheers, Jay
Hi I recently bought a hymer living and I got a big leak when it rains heavy , on inspection the previous owner had attempted to silicone mastic the whole unit shut. ,it wasn’t a very successful bodge. Anyway I thought your blog of removing and resealing was great .but my winder mechanism is jammed solid shut . I tried to see from your pics whether it can still be removed closed and then freed up when you can access the bevel gears etc . Thanks for the pics .
Martin
From memory yes it would come off. I’m not certain but I’m fairly sure you could remove it and sort the winder issue at the same time as resealing it. Best of luck, cheers, Jay
Jay
I have a 2007 Hymer Nova 570 SL Caravan with skylite leaking in heavy rain.
Found your blog, thank you for the detail and am going to follow your steps and totally reseal both the winding mechanism and skylite seals.
Good job and thanks. ( will save me a few £’s ).
Mike R.
Cheers Mike, ours has stayed watertight so the process worked for us. Best of luck, cheers, Jay
THANKS! Absolutely brilliant! After your amazing and practical breakdown for fixing the Skylight leak I’m now confident of doing this job. Appreciate you laying all this out so well for an “amateur”
Cheers Geoff, all the best with the repair, Jay 👍
Job successfully completed! Thanks to your helpful and practical blog. Thanks again. 👍😀☘️
Great stuff.