
Avoid an Expensive Mistake, Mothball Your Motorhome for Winter
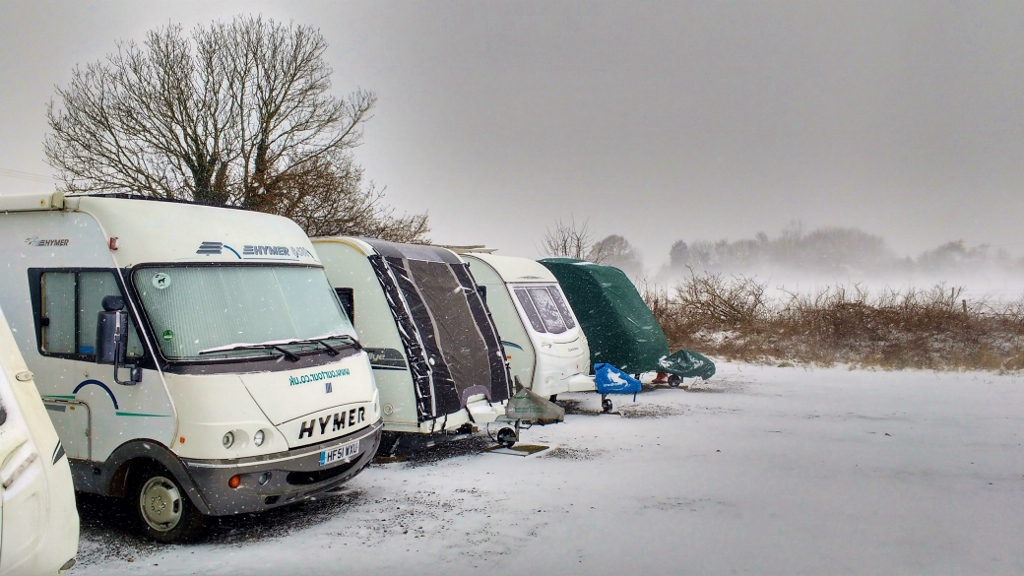
Leaving a motorhome through a British winter without preparing it first can be, as we’ve found to our cost, an expensive mistake. We’ve twice managed to freeze our campervan’s boiler, splitting the pipes inside. We’ve also managed to kill our leisure battery (twice again!) by letting them go completely flat over winter. Fortunately we made these errors with our panel campervan over a decade ago, and the repairs weren’t as expensive as they would be with our more expensive later motorhomes. All the same, it takes about 10 minutes to mothball your motorhome, which might be some of the best minutes you can spend on your rolling home.
These are the steps we take to mothball our van for freezing and dark conditions. It takes much longer to read these steps then it actually does to complete them – once you’ve done the job once it’s really quick to complete each time. At the end I’ll quickly run through the steps to get the van back up and running again when you come to use it again, either in winter or when the light’s started to return in the spring. (of course, you can opt to avoid all of this by just using your motorhome all winter, perhaps to head off skiing for a season – have a look at winterised.com for some inspiration)
1. Avoiding Frozen Pipes or a Bust Boiler
To avoid freezing and splitting pipes in your van’s living space, you need to remove the water from the system. This process will vary a little between motorhomes, and it makes sense to read the manual for your specific make and model of van. If you don’t have the manual and can’t get it online, search around for forums or Facebook groups for your van to find the specific instructions for your van.
These are the steps we take to drain down our van:
- Step 1: Turn off the 12V supply for the van. We do this using the switch on the control panel, and this stops the immersed water pump being damaged when we drain the tank and open the taps. It also means the fridge light doesn’t drain the leisure battery when we leave the door open (see below).
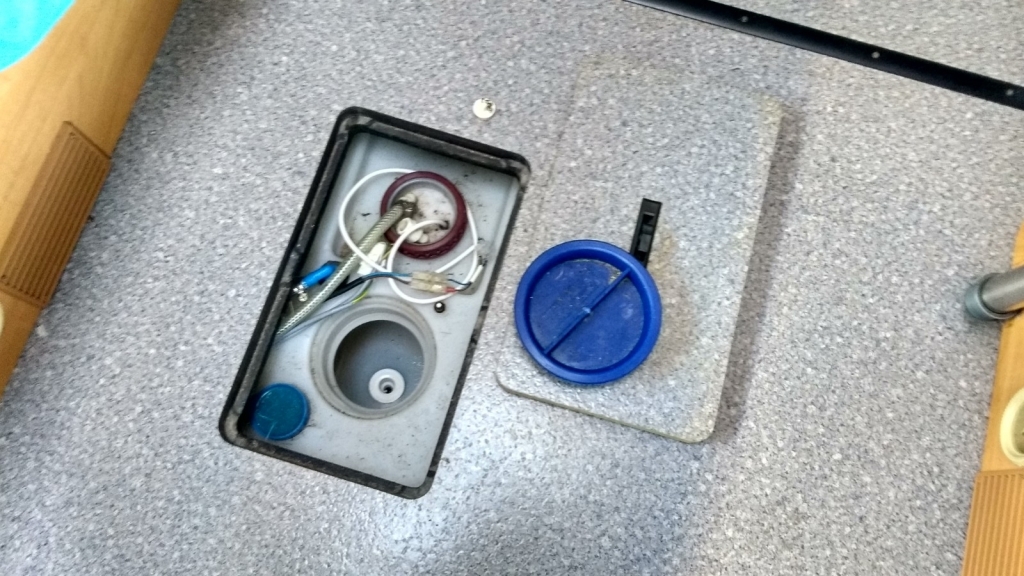
- Step 2: Drain the fresh water tank. Our tank is located under the floor, so we have to lift the carpet and an inset panel to access it. We then unscrew the access cap, reach down and remove the small rubber plug. This drains all of the water out under the van.
- Step 3: Open the fresh water drain valves. Our motorhome has two valves alongside the grey water tap (inside a locker on our van). These need to be ‘unscrewed’ by hand, and as we open each one we can see a stream of water draining from under the valve.
- Step 4: Drain the water heater. Our motorhome’s truma water heater has a frost protection valve which automatically opens and drains all water from the boiler when the temperature gets down to a few degrees above freezing (as long as the leisure battery has enough charge). We make sure the valve is open manually though, by opening the wardrobe, then lifting the cover to the boiler, locating the red button next to the boiler (a head torch comes in handy) and ensuring it is pushed down. Again the water dumps below the motorhome.
- Step 5: Drain the water from the taps. Our motorhome has a tap in the kitchen and one in the bathroom. We turn these so they’re half way between hot and cold and then fully open them. We can hear a small amount of water running out of the taps ‘backwards’ (down the pipes behind them, not coming out of the taps).


We’ve read it’s recommended to use compressed air to ensure there is no water left in your motorhome’s system, but we’ve not done this and haven’t had an issue. That might be luck though, so you might want to have a look at using a Floë draining kit or similar. These are available on Amazon, and the helpful video below shows how to use one of ’em.
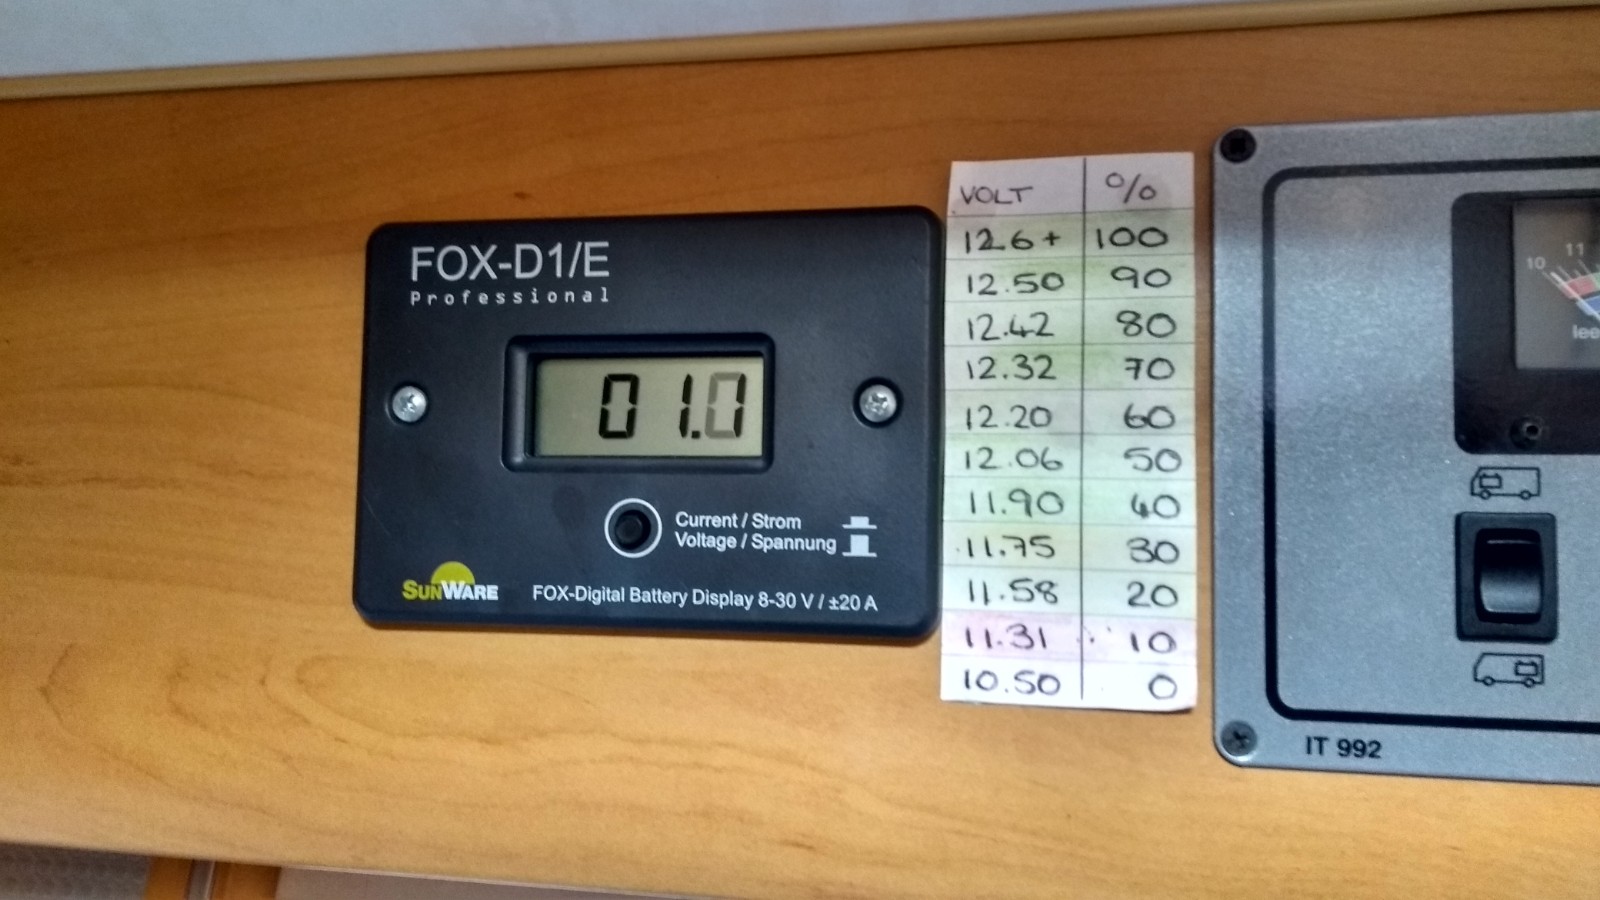
2. Keeping Our Batteries Charged
Our motorhome has two lead-acid leisure batteries plus the engine’s starter battery. If these are fully discharged they don’t handle it well. Before we understood this, we’ve found ourselves unable to start our engine come the spring, or waking to a thin film of frost on top of our duvet when the heating failed one frozen night, as the leisure batteries went flat.
Our van sits in a storage location about a mile from home, where there is no electrical hook-up available. If the van was kept at home where we could run a main cable to it, we could hook it up and the van’s electrics (in our case an Electroblock) would take charge of float charging the leisure and starter batteries (you need to check whether your specific motorhome has this capability).
We could opt to remove the batteries and use a portable charger to keep them charged up at home (there’s a good article about this here). However, our leisure batteries are under the driver and passenger seats in our van, which aren’t that easy to remove, and the starter battery is also awkward to get at. Instead, we choose to leave our batteries in place and rely on our solar panel to trickle charge them over winter. Of course this won’t work when the van is under snow, and on the darker overcast days the panels don’t generate a huge amount of current. Even with minimal load on the batteries, we find we have to check on them over the winter, running the engine or driving the van from time to time to top the batteries up from the alternator.
3. Avoiding Issues with Damp
We’ve found over the years that our motorhome’s pretty much water-tight. It gets a fair bit of condensation in it when we’re using it in winter though, so there is a potential issue with damp air causing damage to the upholstery, the fridge and so on. To try and ensure this isn’t an issue, we take some basic steps:
- Step 1: We remove the bedding. The duvet, pillows and sheets come home for the winter to keep them dry and warm, as do all clothes.
- Step 2: We empty the fridge and freezer, de-ice the freezer and then prop both the freezer and fridge doors open to let the air circulate.
- Step 3: We sometimes pop a de-humidifier/moisture trap in the van to help keep the air dry, especially if we’ve been using the van in cold or wet conditions before mothballing it.

Some folks opt to prop the cupboard and/or seats open the help some air flow through them, but we’ve not found we needed to do this unless they had something damp in them before mothballing the van.
4. Black and Grey Water
As well as emptying the fresh water system, we also empty the toilet cassette, clean it and pop it back in the van. We also empty the grey water, simply by using the tap to dump the tank and normal. Finally we pop a little olive oil onto the toilet blade when it’s back in place in the van to help keep it supple.

5. The Underlying Vehicle
We don’t actually do anything to mothball the underlying Fiat chassis and engine, but we are conscious of the following:
- The starter battery might go flat if left unattended (as noted above).
- Our garage takes care of making sure there is anti-freeze in the van’s coolant system when they service the motorhome.
- We have all-season screen wash in the van’s windscreen washer bottle.
- We have motorhome-specific tyres fitted (Michelin Agelis Camping). These are reputed to be engineered to cope with the van not being moved for months at a time, so all the weight is sat on the same area of the tyre. We do tend to shift the van a little from time-to-time if it’s staying put for months.

6. Other Bits and Bobs
Light Protection: Being winter in Blighty, the sun’s not likely to be beating down for any length of time! All the same, we close the windscreen blinds, skylight blinds and the side window curtains to help keep any sunlight from fading cloth or other surfaces.
Gas: We turn the gas bottles off, just standard safety really, nothing else.
Electronics: We take the TV out of the van, and any other electronics like the laptops etc, mostly because we use these at home but also to keep them from getting cold and damp or being nicked.
That’s your lot. I know it looks like a ton of work but we get it done pretty quickly these days and it just means we don’t have problems come spring.
Bringing Your Van Back to Life
This is the process to get the van going again when we need it:
- Close the sink taps.
- Turn the 12V back on.
- Put the fresh water tank plug back in.
- Pull the frost control valve back up (use a peg to keep it up if it’s still freezing cold, but remember to remove once warmed up).
- Close the two blue drain valves and ensure the grey water tap is closed.
- Refill the fresh water tank.
- Open both taps on cold to get air out of the cold water system.
- Once there’s water running out of both taps, close one of them and gradually turn the other to hot to fill the boiler and remove air from the hot water system. Then do the same for the other tap. This can be a bit of a faff, Check your van’s manual for the correct procedure.
- Turn the gas on, close the fridge and freezer doors and start the fridge on gas. It usually takes an age for it to light and we leave it overnight with blue blocks in the freezer and bottles of water in the fridge to help it get cold.
- Refit the TV, load up your food, bedding, clothes and everything else on your packing list and you’re about ready for the off!
If this Information’s Been Useful…
Then you might find The Motorhome Touring Handbook a handy resource, with a ton more information, to prep for your upcoming motorhome adventures!
Thanks and happy travels! Jay and Ju


Morning
Only thing i do different is l leave water in our fresh tank, enough to keep the submersible pump under water. 3 years ago I drained all the water out, when we came to use the van about a month later after some heavy frosts, I filled the tank up ran the pump and it started blowing fuses, my thoughts are that there was residual water in the pump which had frozen and damaged it. so now lave some in.
Thanks for the blog really enjoy it
Andy
Cracking, thanks Andy. Jay